


Worth a Read
What Is Microneedling? Your Complete Mama’s Guide to Collagen Induction Therapy
TL;DR What is microneedling? Microneedling uses fine, sterile needles to create tiny controlled injuries in…

3 Best International Destinations for Your Family Vacation
TL;DR International family travel does not have to mean expensive, overwhelming, or complicated. Costa Rica,…

Non-Invasive Treatment for a Natural Look: The Busy Mom’s Guide to a Subtle, Refreshed Face
If your calendar is packed and your mirror keeps telling you that you look tired,…

Weekly Roundup


Latest News & Updates
What Is Microneedling? Your Complete Mama’s Guide to Collagen Induction Therapy
TL;DR
- What is microneedling? Microneedling uses fine, sterile needles to create tiny controlled injuries in your skin, triggering your body to produce fresh collagen and elastin naturally.
- There are three types: mechanical (needles only), PRP (adds your own platelet growth factors), and RF (adds radiofrequency heat for skin tightening).
- It treats acne scars, fine lines, hyperpigmentation, stretch marks, enlarged pores, and uneven texture.
- Results build gradually over 3 to 6 months. This is real collagen your body creates, not a surface-level temporary glow.
- A typical series is 3 to 6 sessions spaced 4 to 6 weeks apart, with downtime of only 1 to 3 days of mild redness.
- At-home dermarollers at safe depths (0.25mm) are fine for product absorption between sessions, but they cannot replicate clinical results.
- Always go to a licensed, trained provider. The FDA classifies professional microneedling devices as Class II medical devices for a reason.
Table of Contents
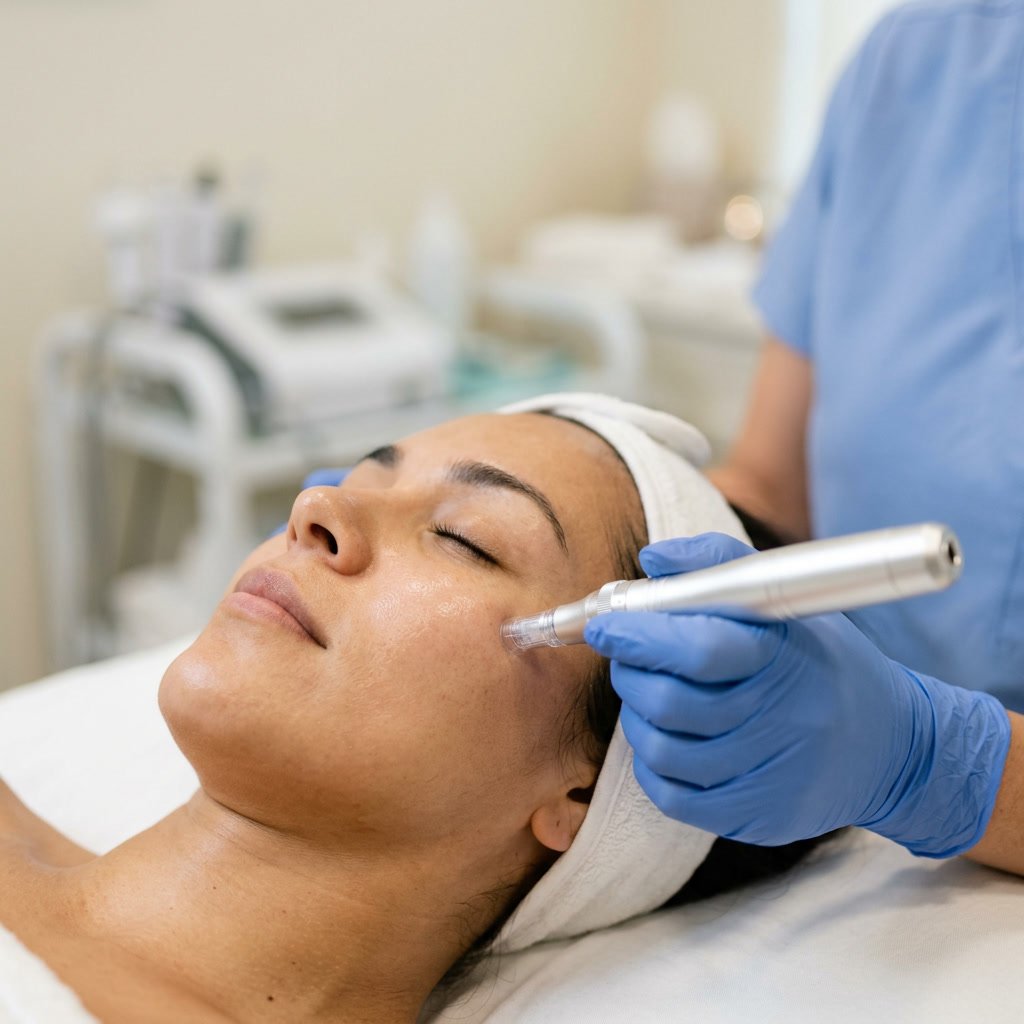
What Exactly Does Microneedling Do?
Microneedling creates thousands of microscopic channels in your skin using fine, sterile needles. Those channels are too small to cause visible damage, but they are large enough to trigger your body’s natural wound-healing response. The result is a surge of fresh collagen and elastin that smooths, firms, and renews your skin over the following months.
You might also see it called collagen induction therapy, which is honestly a more accurate name. The whole point of the treatment is to jumpstart your body’s own collagen production, something that naturally slows down as you age, after pregnancy, or from years of sun exposure.
The American Academy of Dermatology recognizes microneedling as an effective treatment for several common skin concerns. And because the FDA classifies professional devices as Class II medical devices, this is a treatment best performed by a trained, licensed provider in a clinical setting.
How Does Microneedling Work on Your Skin?
Microneedling works by activating your body’s natural healing process in four stages. The entire sequence is designed to build new collagen from the inside out, not just treat the surface.
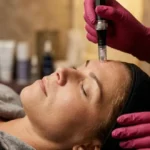
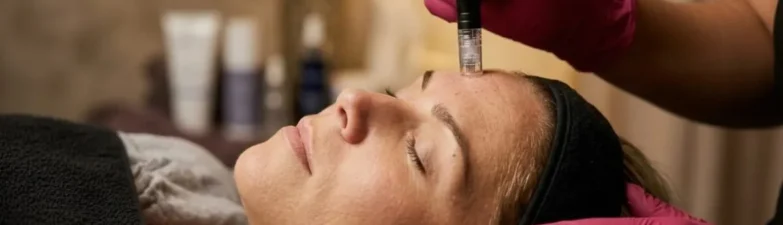
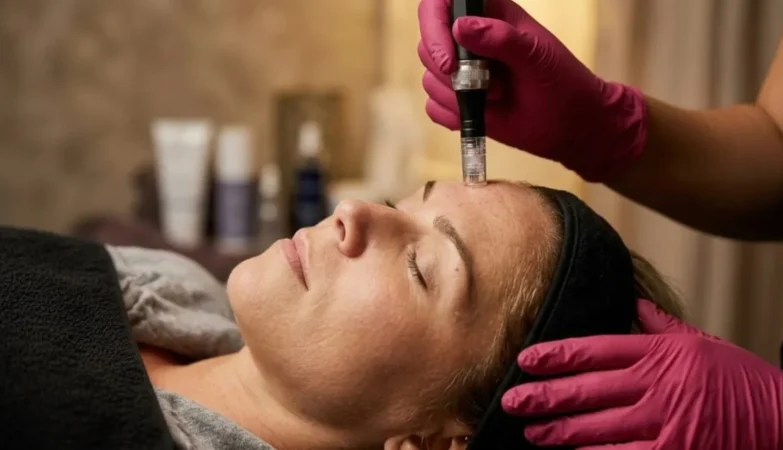
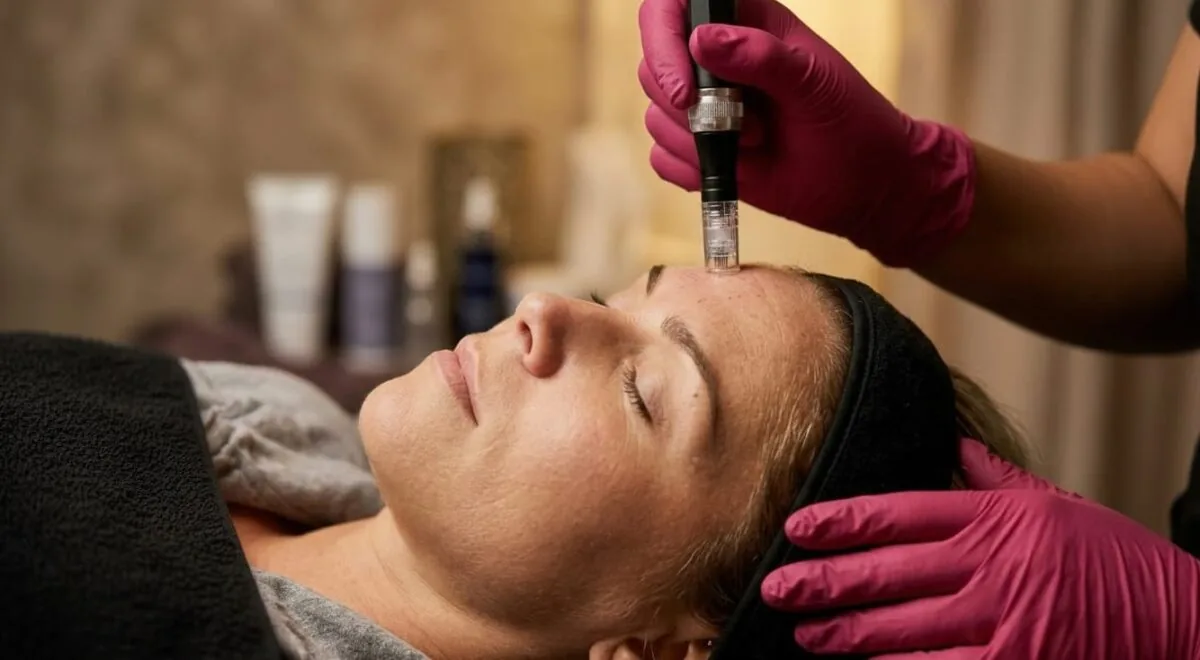
Stage 1: Micro-channels form. Sterile needles create thousands of controlled punctures across the treatment area. Pinpoint bleeding sometimes occurs and is normal.
Stage 2: Your body responds. Within minutes, your immune system identifies the micro-injuries and sends platelets and growth factors to the area. This is the same wound-healing response that repairs a scraped knee, just targeted at a much smaller scale.
Stage 3: New collagen builds. Over the following weeks, fibroblasts (the cells responsible for producing collagen and elastin) ramp up and begin laying down new structural protein in the dermis. This is where the real transformation happens.
Stage 4: Skin remodels over 3 to 6 months. The new collagen matures, organizes, and reinforces your skin’s structure from within. This is why microneedling results look natural and last.
Here is the part that matters for busy mamas managing expectations: you will not see dramatic results the next morning. Initial texture improvement typically appears around 4 to 6 weeks, and the full effect of a session develops over 3 to 6 months. Your body needs time to build collagen. That is a feature, not a flaw.
For a detailed clinical walkthrough of the entire process from an NP’s perspective, this microneedling guide from Express Med Spa is one of the most thorough we have found.
The Three Types of Microneedling
This is the part most articles skip, and it matters. There is not one microneedling treatment. There are three primary variants, each with a different mechanism and a different sweet spot. Understanding which one fits your skin goals can save you time and money.
Mechanical Microneedling
Mechanical microneedling is the baseline: needles only, no added energy or products. It is the most affordable option, has the shortest visit time, and produces solid collagen results for early signs of aging, mild texture concerns, and superficial acne scars.
This is often the best starting point if you are new to microneedling, working within a budget, or dealing with mild skin concerns. It is also the safest variant for deeper skin tones, because there is no added thermal energy that could trigger post-inflammatory hyperpigmentation.
PRP Microneedling
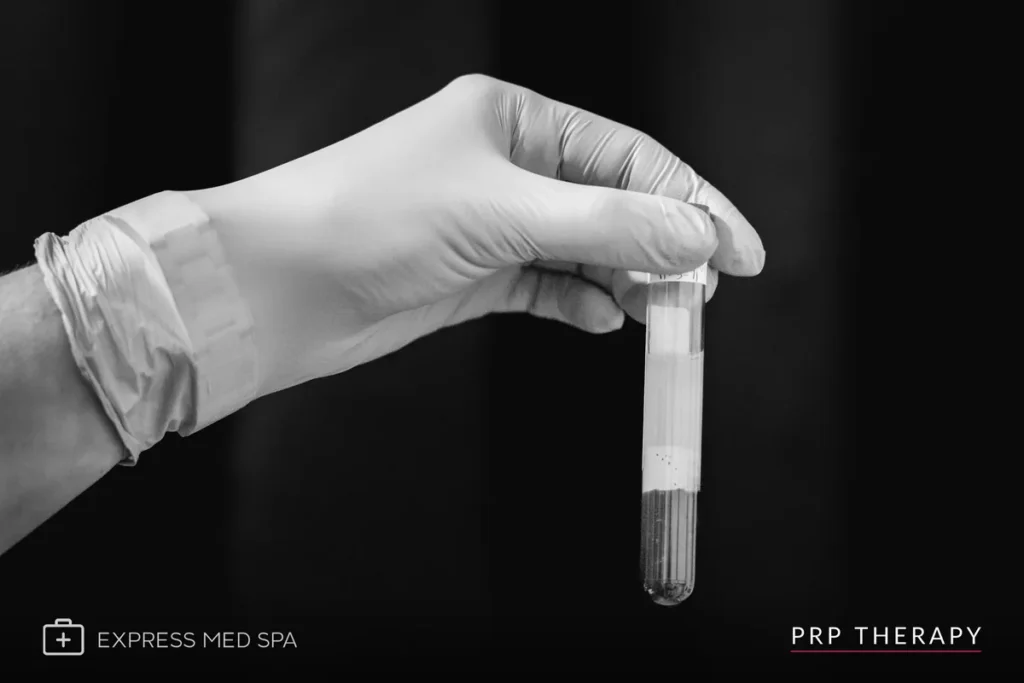
PRP microneedling adds platelet-rich plasma, drawn from your own blood, to the standard microneedling pass. At the start of your session, a small blood sample (comparable to a routine lab draw) is taken and spun in a centrifuge to separate the platelet concentrate. That PRP is then applied topically during and after the microneedling pass.
The growth factors in your own platelets absorb through the open micro-channels and amplify the collagen response. Peer-reviewed studies show modest-to-meaningful additive benefit over mechanical microneedling alone, especially for atrophic acne scars and age-related skin changes.
You may have heard this called the “vampire facial,” a name that stuck after a celebrity photo went viral in 2013. The clinical name is more accurate, and the treatment itself is far less dramatic than the nickname suggests.
RF Microneedling
RF microneedling adds radiofrequency energy to the microneedling pass. As the needles penetrate the dermis, RF energy delivered through the needle tips heats deeper tissue, creating small thermal zones that trigger additional collagen formation. The heat also causes immediate elastin contraction, providing a modest skin-tightening effect.
RF microneedling is the right choice when your concerns include mild-to-moderate laxity, deeper acne scars (especially boxcar scars), or skin tightening as an added goal. It is the most intensive of the three variants and typically costs more per session.
Quick Comparison: Which Type Is Right for You?
| Feature | Mechanical | PRP | RF |
|---|---|---|---|
| How it works | Needles only | Needles + your platelet growth factors | Needles + radiofrequency heat |
| Best for | Mild texture, fine lines, first-timers | Acne scars, skin renewal, enhanced collagen | Deeper scars, skin tightening, laxity |
| Session time | 60 minutes | 75-90 minutes | 75-90 minutes |
| Safe for darker skin tones | Yes (best option) | Yes | Use caution (thermal energy risk) |
| Relative cost | $ | $$ | $$$ |
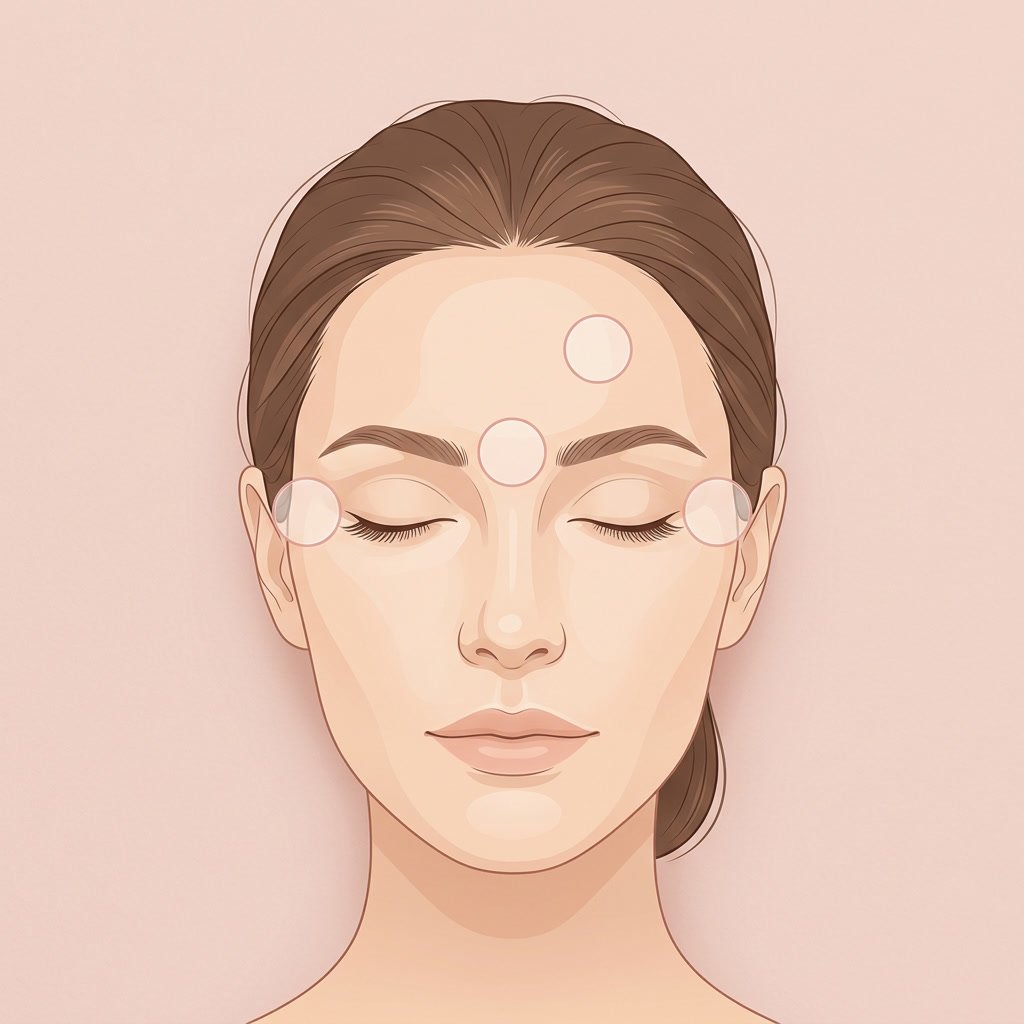
What Does Microneedling Treat?
Microneedling has strong clinical evidence for several common skin concerns. Here is an honest look at what it does well and where expectations should be realistic.
Acne Scars
This is the indication with the strongest peer-reviewed evidence. Microneedling is well-established for atrophic acne scars, the indented kind, including rolling, boxcar, and ice pick subtypes. Rolling scars respond best. Boxcar scars respond moderately. Ice pick scars are the hardest to treat and often need a combination approach.
Realistic improvement: 30 to 60% in scar appearance, depending on scar type, variant chosen, and number of sessions. That is meaningful improvement, not erasure.
Microneedling is not appropriate for raised scars (hypertrophic or keloid). Those require different treatments entirely.
Fine Lines and Static Wrinkles
Microneedling addresses static wrinkles, the kind visible when your face is at rest, caused by collagen and elastin loss. By stimulating new collagen production, it helps rebuild the dermal scaffolding that aging gradually breaks down.
It does not treat dynamic wrinkles, the kind caused by muscle movement like frown lines and crow’s feet. Those are the domain of neurotoxins. Many women combine microneedling with neurotoxins to address both types in a single plan.
Hyperpigmentation and Sun Damage
Microneedling helps with post-inflammatory hyperpigmentation (PIH) and sun damage, especially when paired with a proper topical regimen and consistent sun protection. Melasma is more complex and requires cautious handling, as microneedling can sometimes make it worse without the right protocol.
Stretch Marks
Microneedling can improve the appearance of stretch marks, particularly newer red stretch marks on the abdomen, hips, and thighs. Mature white stretch marks respond less dramatically. Realistic improvement runs around 50 to 75% in appearance, not removal.
Enlarged Pores and Skin Texture
The collagen reinforcement around pore margins makes pores appear smaller. The pores themselves do not shrink, but the tissue around them tightens. For uneven texture from past breakouts, sun damage, or aging, microneedling smooths the surface gradually over a series.
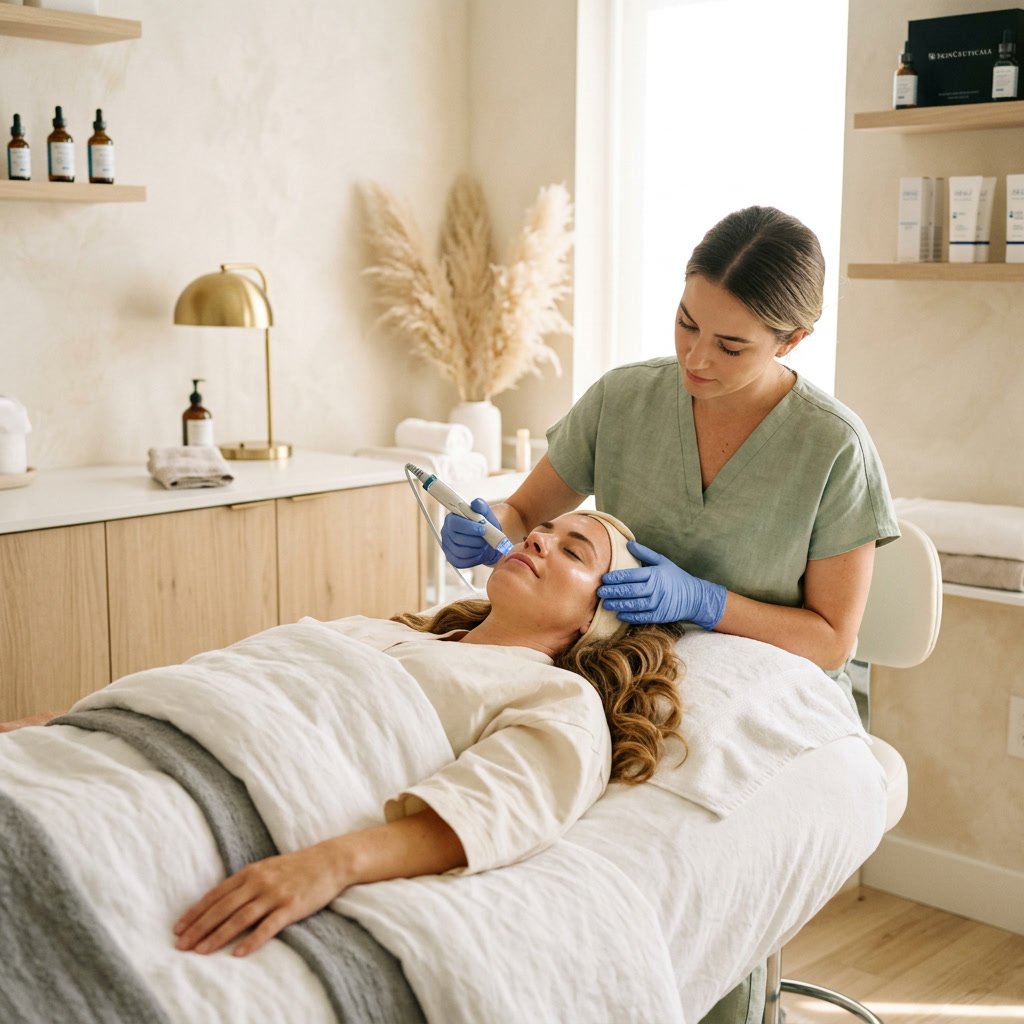
What to Expect During a Microneedling Session
Knowing exactly what happens takes the mystery (and the anxiety) out of your first visit. Here is the step-by-step.
- Consultation and skin assessment (15 to 30 minutes for your first visit). Your provider evaluates your skin, discusses your goals, and recommends the right variant and depth.
- Topical numbing (20 to 30 minutes). A numbing cream is applied so the treatment is comfortable. For PRP sessions, your blood draw happens during this window so the centrifuge can process while you wait.
- Cleanse. The numbing cream is removed and your skin is thoroughly cleansed.
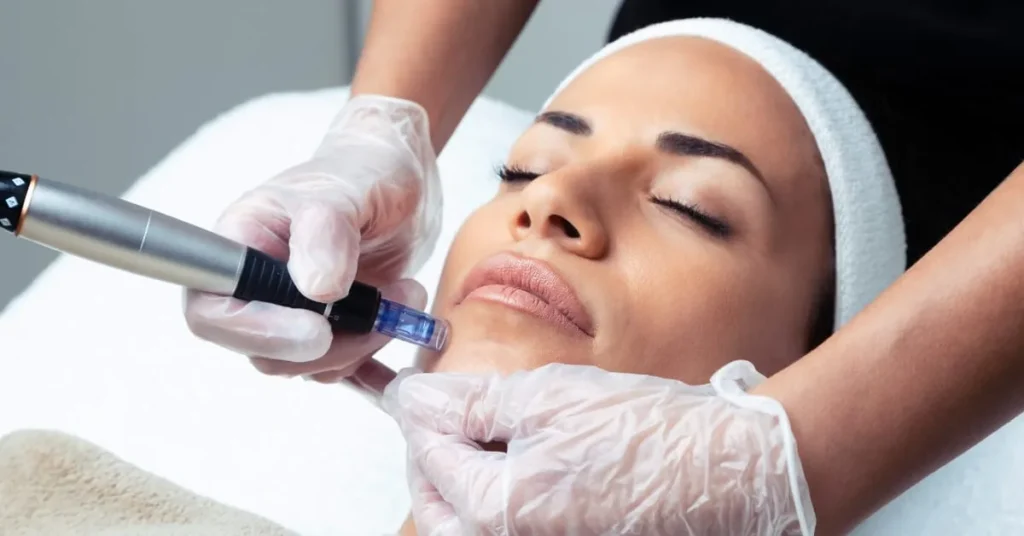
- The microneedling pass (15 to 30 minutes). The pen moves across your treatment area in even strokes. Most women describe the sensation with numbing as a 2 to 4 out of 10 on the discomfort scale.
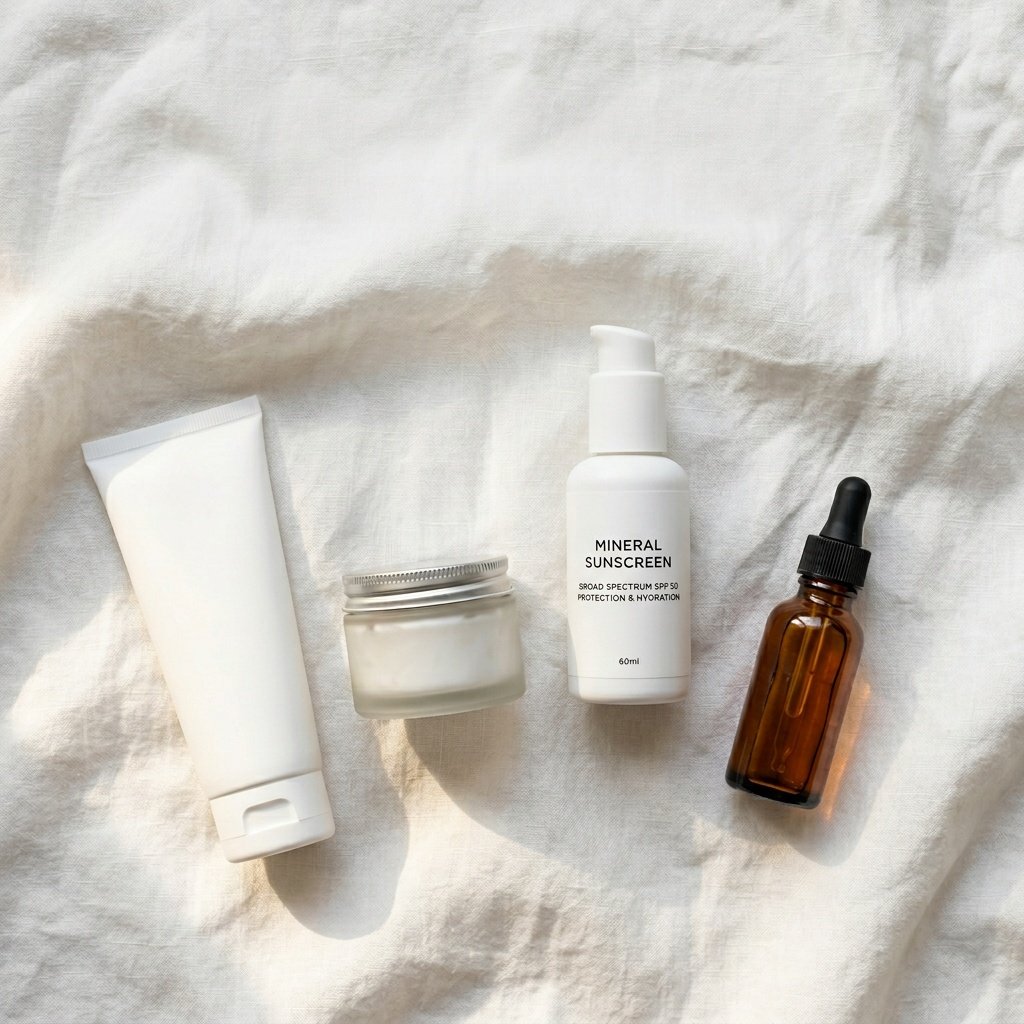
- Soothing serum. A hyaluronic acid layer is applied (PRP if you chose that variant), followed by mineral SPF if you are heading outside.
- Aftercare instructions. You leave with a clear protocol for the next 7 to 14 days.
Total visit time: 60 to 90 minutes. PRP and RF variants are on the longer end.
How Many Sessions Will You Need?
The number of sessions depends on what you are treating. Here is a general guide.
| Concern | Sessions | Spacing |
|---|---|---|
| General skin renewal (fine lines, texture, pores) | 3 to 4 | 4 to 6 weeks apart |
| Acne scars | 4 to 6 | 4 to 6 weeks apart |
| Stretch marks | 6 to 10 | 4 to 6 weeks apart |
| Annual maintenance | 1 per year | Ongoing |
Your provider will set the exact cadence based on your skin and goals at your first consultation.
If you are still exploring your options before committing to injectables, these 5 non-invasive beauty treatments built for mom life give you a solid comparison of what is available at a med spa without any downtime pressure.
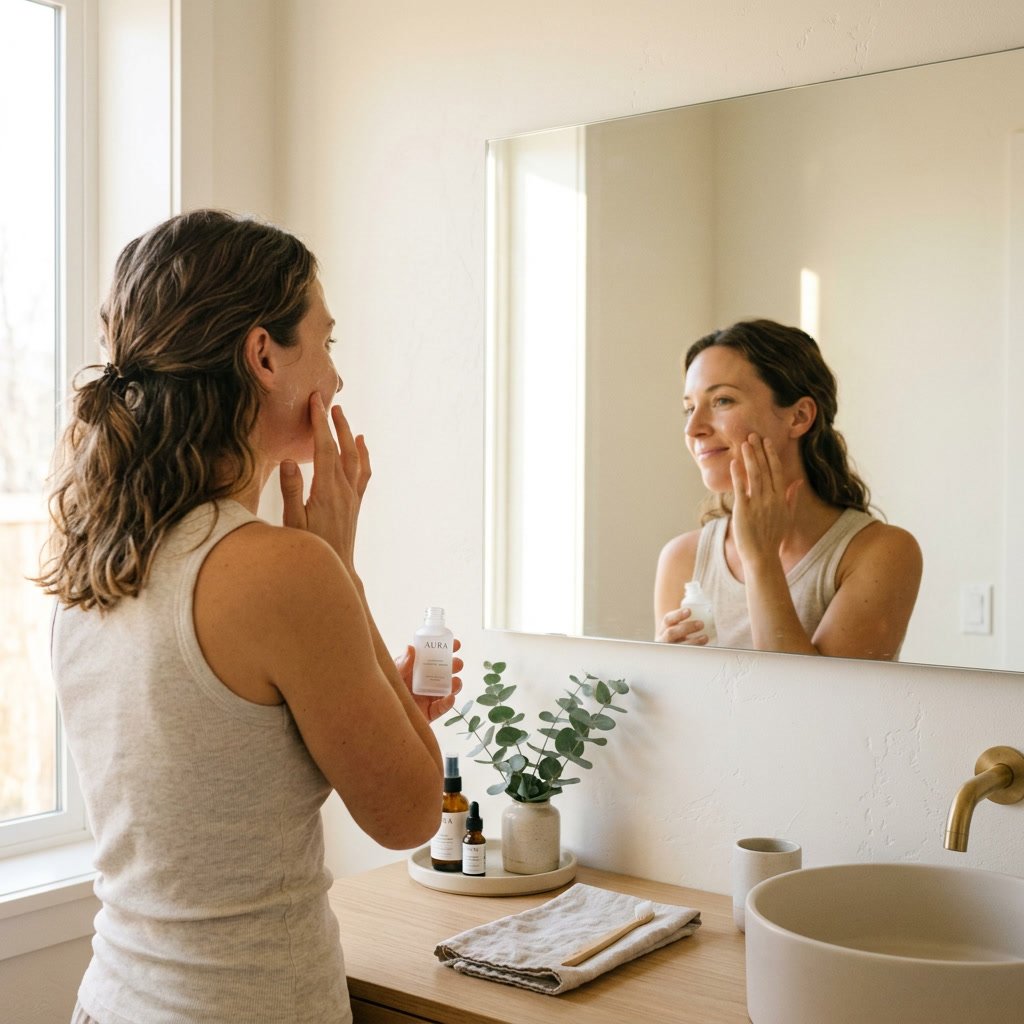
Downtime and Aftercare: What Busy Mamas Need to Know
This is where microneedling really shines for women who cannot take a week off from life. Downtime is minimal.
Expect mild redness for 1 to 3 days, similar to a light sunburn. Mild dryness, peeling, and tightness in the days after are normal and are actually a sign the collagen response is underway.
The aftercare non-negotiables:
- Mineral SPF 30+ daily for at least 14 days. This is the single most important rule for protecting your results.
- No active ingredients (retinol, AHAs, BHAs, vitamin C serums) for 5 to 7 days.
- No sauna, steam, hot yoga, or chlorine for 3 to 5 days.
- No makeup for 24 to 48 hours.
Follow these rules and your skin will thank you. Skip the SPF and you risk undoing everything the treatment just built.
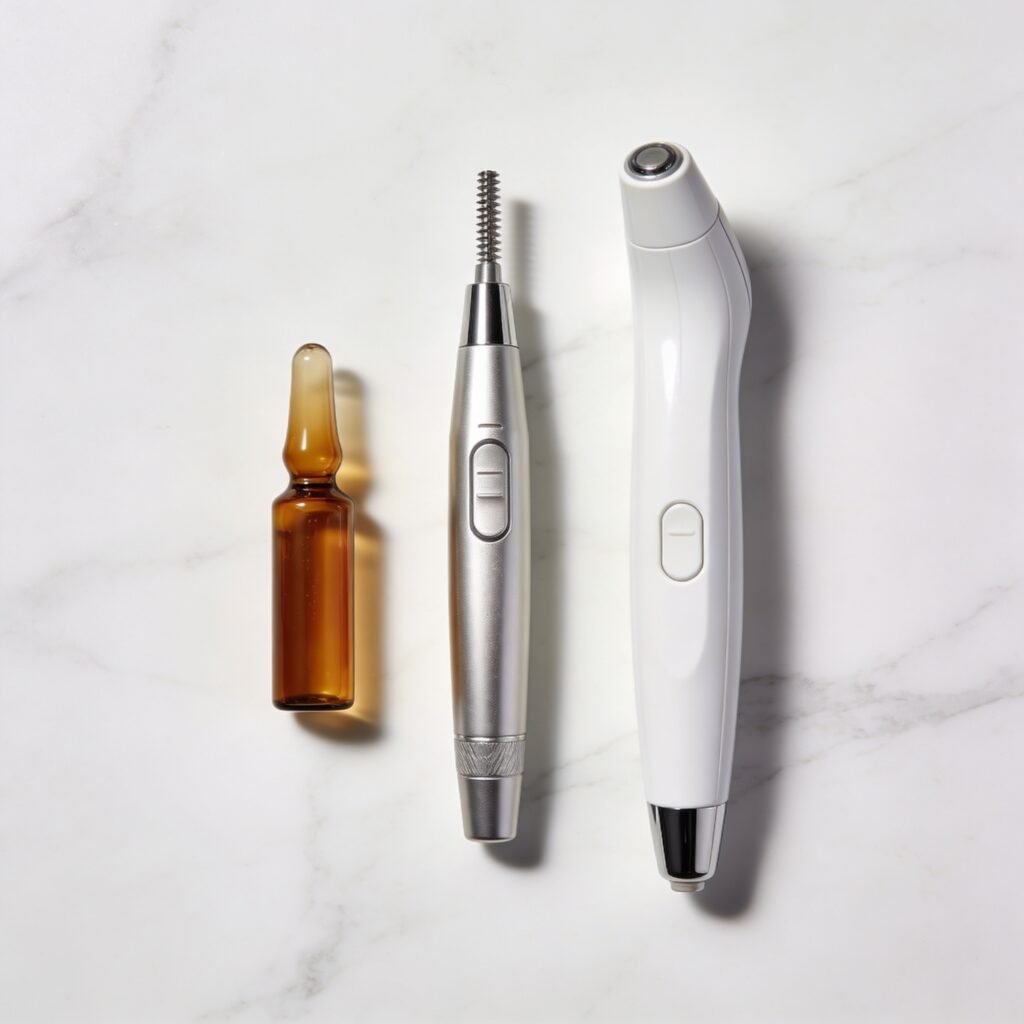
Microneedling at Home vs. Professional: The Real Difference
This deserves a straight answer. At-home dermarollers exist, and some of them are perfectly fine for what they are. The key is understanding what they can and cannot do.
At-home rollers at 0.25mm depth are too shallow to trigger clinical collagen production. They may help your serums absorb slightly better, and they are generally safe to use weekly with a clean roller.
Clinical microneedling uses 1.5 to 2.5mm depth. That is the range where real collagen induction happens. At-home devices at consumer-safe depths simply do not reach the tissue that matters.
A few more things worth knowing:
- Sterility matters. A reused at-home roller, even one you clean carefully, carries infection risk. Professional clinics use single-use sterile cartridges, one per patient, discarded immediately after.
- At-home rollers cannot deliver PRP or RF energy. Two of the three microneedling variants do not exist outside a clinical setting.
- At-home rollers can trigger hyperpigmentation if used on the wrong skin type or without proper sun protection.
The bottom line: light at-home rolling (0.25mm) is fine for maintenance between professional sessions. For acne scars, hyperpigmentation, fine lines, or any real skin concern, professional treatment is the way to go.
Is Microneedling Safe?
Microneedling is generally safe when performed by a trained, licensed provider with proper screening. That said, it is not for everyone.
You should not get microneedling if you have:
- Active skin infection at the treatment site
- Used isotretinoin (Accutane) within the last 6 months
- A history of keloid scarring
- Are pregnant
- Severe active cystic acne
- Open wounds at the treatment site
- Recent radiation therapy
- For PRP specifically: active bleeding disorders or anticoagulation therapy
If any of these apply, a good provider will recommend an alternative treatment that is safe for your situation. A provider who does not ask about these things before treating you is a red flag.
How Long Do Microneedling Results Last?
A completed microneedling series produces collagen that remains visible for 6 to 12 months or longer. Lifestyle factors affect how long the results hold: sun exposure, smoking, sleep quality, and nutrition all play a role.
Annual maintenance sessions extend the benefits indefinitely. Think of it like this: your body built new collagen, and a yearly session keeps that investment compounding.
For a clinical overview of how microneedling works and what to expect, the Mayo Clinic’s microneedling guide is a reliable starting point.
Microneedling vs. Chemical Peels: How Do They Compare?
Both microneedling and chemical peels are collagen-stimulating skin renewal treatments, but they work through completely different mechanisms. Microneedling creates mechanical micro-injuries to trigger collagen from within. Chemical peels use controlled acid exfoliation to remove damaged outer layers and stimulate renewal from the surface down.
Neither is universally better. Microneedling tends to be the stronger choice for acne scars and deeper textural concerns. Chemical peels often work better for surface-level discoloration and dullness. Many women use both over time as part of a comprehensive skin renewal plan.
Key Takeaways
- Microneedling is collagen induction therapy: controlled micro-injuries that trigger your body to produce new collagen and elastin naturally.
- Three types exist (mechanical, PRP, RF), each with different strengths. Your provider should recommend the right one for your specific concerns.
- The strongest evidence is for atrophic acne scars (30 to 60% improvement), with meaningful results also seen for fine lines, hyperpigmentation, stretch marks, and skin texture.
- Results build over 3 to 6 months. This is a gradual, natural process, not an overnight transformation.
- Downtime is 1 to 3 days of mild redness. SPF is non-negotiable during aftercare.
- At-home rollers are fine for light maintenance, but professional treatment is required for real results.
- Always choose a licensed, trained provider who screens you properly before treatment.
Found this helpful? Share it with a mama who needs it, and drop your biggest skin question in the comments below.
Always consult with a licensed provider before booking any treatment.
Frequently Asked Questions
What exactly is microneedling?
Microneedling is a skin renewal treatment that uses fine, sterile needles to create thousands of tiny controlled injuries in your skin. Your body responds by producing new collagen and elastin, gradually improving texture, fine lines, acne scars, and hyperpigmentation over 3 to 6 months. It is also called collagen induction therapy.
Does microneedling hurt?
With topical numbing cream applied before the treatment, most women rate the sensation as a 2 to 4 out of 10 on the discomfort scale. It feels like light prickling or vibration across the skin. The numbing cream sits for 20 to 30 minutes before the procedure begins, so you are well-prepared.
How many microneedling sessions do I need?
A typical series is 3 to 4 sessions for general skin renewal and 4 to 6 sessions for acne scars, spaced 4 to 6 weeks apart. Stretch marks may need 6 to 10 sessions. Your provider will set the right plan at your consultation based on your skin and goals.
How long do microneedling results last?
Results from a completed series last 6 to 12 months or longer. Lifestyle factors like sun protection, nutrition, and sleep quality affect longevity. One annual maintenance session keeps the collagen benefits compounding over time.
What is the difference between microneedling and PRP microneedling?
Standard mechanical microneedling uses needles only. PRP microneedling adds platelet-rich plasma, drawn from your own blood and applied during the treatment, to deliver extra growth factors through the open micro-channels. Studies show PRP provides additive benefit, especially for acne scars and skin renewal.
Can I do microneedling at home?
At-home dermarollers at 0.25mm are safe for light product-absorption maintenance between professional sessions. However, clinical microneedling uses 1.5 to 2.5mm depth, which is where real collagen induction occurs. At-home devices cannot reach that depth safely, cannot deliver PRP or RF energy, and carry higher infection risk with reused rollers.
What is the downtime after microneedling?
Expect 1 to 3 days of mild redness similar to a light sunburn. Mild dryness and peeling are normal. You should avoid makeup for 24 to 48 hours, skip active ingredients (retinol, AHAs, BHAs) for 5 to 7 days, and wear mineral SPF 30+ daily for at least 14 days.
Is microneedling safe for all skin tones?
Mechanical microneedling is generally safe for all skin tones and is considered the safest variant for deeper complexions. RF microneedling requires more caution with darker skin tones because the thermal energy can trigger post-inflammatory hyperpigmentation. A knowledgeable provider will choose the right variant and settings for your skin tone.
Who should not get microneedling?
You should avoid microneedling if you have an active skin infection, have used isotretinoin (Accutane) within 6 months, have a history of keloid scarring, are pregnant, have severe cystic acne, or have open wounds at the treatment site. For PRP, active bleeding disorders are also a contraindication.
Is microneedling better than a chemical peel?
They work differently and each has strengths. Microneedling tends to be better for acne scars and deeper texture concerns. Chemical peels are often more effective for surface discoloration and dullness. Many women incorporate both treatments over time as part of a broader skin renewal plan. Your provider can help you decide which makes sense to start with.

3 Best International Destinations for Your Family Vacation
TL;DR
- International family travel does not have to mean expensive, overwhelming, or complicated.
- Costa Rica, Portugal, and Belize are three of the most family-friendly international destinations for mamas who want adventure without the stress.
- Each destination offers English-friendly experiences, kid-approved activities, and memories that will last a lifetime.
- Belize is English-speaking, close to the US, and budget-friendly with stunning reefs and Mayan ruins.
- Portugal is Europe’s most underrated gem, packed with history, beaches, and warm locals.
- Costa Rica delivers wildlife, jungle adventures, and beautiful beaches in one easy-to-navigate trip.
- Planning ahead, packing smart, and choosing family-forward resorts makes all the difference.
Table of Contents
International Destinations for Your Family Vacation. You have been dreaming about it. A vacation that is actually enjoyable, not just a blur of jet lag, tantrums at baggage claim, and overpriced resort food. The good news, mama? International destinations for family vacation have never been more accessible, and some of the best ones are places most people never even consider.
Skip the crowds fighting over the Eiffel Tower. Skip the lines at the Colosseum with a stroller. These three destinations offer your family something better: genuine adventure, rich culture, breathtaking nature, and the kind of memories that have your kids retelling stories for years. Pack those bags. You deserve this.
Before you finalize any international trip, it is worth spending a few minutes with the CDC’s destination travel health pages, where you can look up vaccine recommendations, health notices, and safety tips specific to wherever your family is headed. It takes five minutes and gives you serious peace of mind.
Why Take Your Family on an International Vacation?
International travel with kids does more than check a bucket list item. It expands their world in ways that no classroom ever could.
Children who travel internationally develop stronger empathy, sharper curiosity, and a broader understanding of how the world works. Research consistently shows that exposure to different cultures and environments builds adaptability and confidence in kids of all ages.
For mamas, an international family vacation is also a chance to model the kind of bold, curious, and intentional life you want your children to emulate. You are not just taking a trip. You are teaching them how to move through the world.
The 3 Best International Destinations for Your Family Vacation
These three destinations were chosen for their combination of family-friendliness, accessibility from the US, English availability, and that one quality every mama needs most: ease. They are unique enough to feel like an adventure and practical enough not to require a travel agent with a PhD.

1. Costa Rica: Where Adventure Meets Paradise
Why Costa Rica Is Perfect for Families
Costa Rica is one of the most celebrated international destinations for family vacation, and for good reason. The country packs beaches, rainforests, volcanoes, and wildlife into a small, easy-to-navigate space, making it ideal for families who want variety without exhausting travel days in between.
The country is politically stable, has a well-developed tourism infrastructure, and is a short flight from most US cities. Costa Ricans, known as Ticos, are famously warm and welcoming, and English is widely spoken in tourist areas throughout the country.
Perhaps best of all, Costa Rica runs on the motto “Pura Vida,” meaning pure life. That laid-back, joyful energy is contagious, and your family will feel it the moment you land.
Top Things to Do with Kids in Costa Rica
Wildlife encounters are the highlight for most families. The country is home to over 500,000 species of plants and animals, including sloths, toucans, howler monkeys, and sea turtles. A visit to Manuel Antonio National Park puts you face to face with incredible wildlife while hiking trails that even toddlers can manage.
Zip-lining through the cloud forest in Monteverde is a must-do for thrill-seeking kids and brave mamas. Reputable tour companies offer beginner-friendly lines that let younger children participate safely. The experience of flying above a jungle canopy is simply unforgettable.
Beach days at destinations like Tamarindo, Nosara, or the Nicoya Peninsula offer calm, family-safe waters perfect for surfing lessons. Many resorts along the Pacific and Caribbean coasts cater specifically to families with kids’ clubs, shallow pools, and organized nature activities.
White water rafting on the Pacuare River is available in gentler versions for families with older kids. Tour operators offer half-day beginner routes that give you the thrill of the rapids without the risk.
Hanging bridges in the Arenal area let families walk above the jungle canopy at a calm pace, spotting birds and butterflies along the way. It is the perfect complement to the high-energy activities.
Practical Tips for Your Costa Rica Family Trip
- Best time to visit: December through April is the dry season and ideal for beach-focused families. May through November brings lush greenery and fewer crowds, though afternoon rain is common.
- Getting around: Renting a 4×4 vehicle gives you the freedom to explore. Many families opt for private transfers between destinations to avoid the challenge of navigating unfamiliar roads with tired kids.
- Where to stay: Arenal, Manuel Antonio, and the Nicoya Peninsula each offer excellent family resorts. Look for properties with kids’ programs and in-house naturalist guides.
- Health and safety: Costa Rica requires no specific vaccinations beyond routine ones for most travelers. Check the CDC travel health notices at cdc.gov for the most current guidance before your trip.
- Budget: Costa Rica ranges from budget-friendly hostels to luxury eco-lodges. A mid-range family trip averages $250 to $400 per day for a family of four, all-in.

2. Portugal: Europe’s Most Underrated Family Gem
Why Portugal Is a Dream International Family Vacation
If you have been dreaming about Europe but not the price tag or the chaos, Portugal is your answer. It is one of the most affordable Western European countries and consistently ranks among the safest destinations in the world. For families looking at international destinations for family vacation in Europe, Portugal delivers everything without the premium.
Lisbon and Porto are two of the most walkable, charming cities in Europe, with cobblestone streets, colorful tiles, and gelato shops around every corner. The Algarve coast in the south rivals any beach in the Mediterranean, with golden cliffs, calm coves, and crystalline blue water.
Your kids will love the history, the food, and the pace. You will love the price, the safety, and the wine. Everyone wins.
Top Things to Do with Kids in Portugal
Exploring Lisbon is an adventure in itself. Ride the iconic yellow Tram 28 through the old city, visit the Oceanarium (one of Europe’s best aquariums), and let your kids climb the towers of Castelo de Sao Jorge for panoramic views across the city. Lisbon is stroller-friendly in many areas, though the cobblestones in older neighborhoods require sturdy wheels.
Day trips from Lisbon open up a world of fairy-tale experiences. Sintra, just 40 minutes away by train, is a UNESCO World Heritage Site with colorful palaces perched on forested hillsides. The Pena Palace and the Moorish Castle are kid-approved highlights that feel genuinely magical.
The Algarve coast is pure paradise for beach-loving families. Praia da Marinha, Praia de Benagil, and Lagos offer calm, sheltered coves perfect for young swimmers. Boat tours through the sea caves are a major hit with kids. Sea kayaking and paddleboarding are widely available for older children.
Porto is worth a two-night stop, especially for families who enjoy good food and beautiful architecture. The riverside Ribeira district is UNESCO-listed, and the Serralves Museum has excellent contemporary art alongside beautiful landscaped gardens perfect for a family picnic.
Portuguese food is a family vacation highlight. Fresh seafood, pasteis de nata (warm custard tarts), grilled chicken, and hearty soups are universally kid-approved. Dining out in Portugal is affordable by European standards, and restaurants are genuinely family-welcoming.
Practical Tips for Your Portugal Family Trip
- Best time to visit: May through October offers warm, sunny weather. July and August are peak season and busiest in the Algarve. May, June, and September offer the best balance of weather and fewer crowds.
- Getting around: Portugal has an excellent train system connecting Lisbon, Porto, and the Algarve. Renting a car opens up the countryside. Many families base themselves in Lisbon or the Algarve and take day trips.
- Where to stay: Lisbon and Cascais are ideal family bases near the capital. The Algarve offers everything from family resorts to villa rentals. Vila Vita Parc and Conrad Algarve are renowned family-friendly luxury options, while apartment rentals keep costs low.
- Health and safety: Portugal is consistently ranked one of the safest countries in the world. No special vaccinations are required for US travelers. Review the State Department travel advisory at travel.state.gov before booking.
- Budget: Portugal is one of Europe’s best-value destinations. A mid-range family of four can travel comfortably for $200 to $350 per day, including accommodation, meals, and activities.

3. Belize: The English-Speaking Caribbean Gem Mamas Need to Know About
Why Belize Is the Perfect International Destination for Families
Here is a destination most mamas have never seriously considered, and that is exactly why you should. Belize is an English-speaking Caribbean country that sits just two hours by plane from most US Southern and Midwestern cities. It is compact, incredibly diverse, and offers a combination of beach, jungle, and ancient culture that is almost impossible to find anywhere else.
The Belize Barrier Reef, the second-largest in the world, is right off the coast and offers some of the best snorkeling and diving in the Western Hemisphere. Inland, dense jungle hides Mayan ruins, cave systems, and wildlife reserves that will leave your family genuinely speechless. The country is also one of the most affordable international destinations for family vacation in the Caribbean region.
Top Things to Do with Kids in Belize
Snorkeling the Belize Barrier Reef is an experience that rivals anything in the Maldives or Great Barrier Reef, at a fraction of the cost. Hol Chan Marine Reserve and Shark Ray Alley near Ambergris Caye allow families to swim alongside nurse sharks, stingrays, and technicolor tropical fish in shallow, calm water. Most tour operators offer beginner-friendly guided snorkel tours.
Exploring Mayan ruins gives your trip an incredible educational layer. Xunantunich, Lamanai, and Caracol are three of the most accessible sites for families. Kids can actually climb many of the structures, unlike in other parts of the world where ruins are roped off. The views from the top of El Castillo at Xunantunich are breathtaking.
Cave tubing on the Caves Branch River is one of Belize’s most beloved family activities. You float through a series of ancient Mayan cave systems on inner tubes with headlamps, spotting stalactites and river wildlife. It is gentle enough for younger children and thrilling enough for teenagers.
ATM Cave (Actun Tunichil Muknal) is a more adventurous option for families with older kids. This sacred Mayan cave requires hiking, swimming, and climbing, and it houses ancient Mayan artifacts inside. It is a world-class experience unlike anything else in the Caribbean.
San Pedro and Ambergris Caye offer a relaxed island base with golf cart transportation, calm Caribbean waters, and family-friendly restaurants lining the waterfront. The pace is slow, the food is fresh, and the people are genuinely welcoming.
Practical Tips for Your Belize Family Trip
- Best time to visit: December through April is dry season and ideal for reef activities. May brings the shoulder season with lush greenery and fewer tourists.
- Getting around: Ambergris Caye requires a short domestic flight or boat from Belize City. Inland areas are best accessed via rental car or organized tours. Many families split their trip between the caye and an inland jungle lodge.
- Where to stay: Ambergris Caye is the most developed tourist hub with a wide range of family resorts. Inland, eco-lodges near the ruins offer an immersive jungle experience. The Lodge at Chaa Creek is a standout family choice.
- Health and safety: Belize is generally safe for tourists, particularly in popular tourist destinations. Mosquito protection is important for jungle areas. Check CDC travel health guidelines for current recommendations.
- Budget: Belize is more affordable than many Caribbean islands. A family of four can travel comfortably for $200 to $350 per day depending on accommodation style.
How to Plan the Perfect International Family Vacation
Start with Your Family’s Travel Style
Before you book, know your crew. Adventure-seekers thrive in Costa Rica. Culture-lovers flourish in Portugal. Beach-and-history families find everything they need in Belize. Matching the destination to your family’s energy makes the whole trip work.
Think about your youngest traveler first. Long-haul flights over eight hours can be tough on toddlers, which is why these three destinations, all reachable in under ten hours from most US cities, are practical choices for families at every stage.
Pack Smart for International Travel with Kids
A good packing strategy is the difference between a smooth trip and a chaotic one. Bring one carry-on per person with the essentials including a change of clothes, snacks, medications, and entertainment for the flight. Check luggage for everything else.
A small first aid kit, sunscreen, and insect repellent are non-negotiables for all three destinations. Travel insurance is also worth every penny for international family trips, covering everything from canceled flights to unexpected medical needs.
Book Early and Use a Family-Focused Travel Agent When Needed
International family vacation deals are most competitive when booked three to six months in advance. Holiday periods, especially summer and spring break, require even earlier planning. If coordinating the logistics feels overwhelming, a travel agent who specializes in family travel can save you hours and often find deals you would never find on your own.
Key Takeaways
- International destinations for family vacation are more accessible than most mamas realize.
- Costa Rica, Portugal, and Belize are three of the best options for families seeking unique experiences outside the typical tourist circuit.
- All three are English-friendly, reachable within ten hours from the US, and packed with family-appropriate activities.
- Choosing the right destination depends on your family’s style: adventure (Costa Rica), culture and beaches (Portugal), or reef and ruins (Belize).
- Planning ahead, packing strategically, and prioritizing family-forward accommodations makes the entire experience smoother.
- Your children will not remember the perfect hotel. They will remember the sloth you spotted together in the rainforest, the wave they caught in the Atlantic, and the cave they explored by headlamp.
- You deserve this adventure. So does your family. Go.
Found this helpful? Share it with a mama who needs it, and drop your biggest family travel question in the comments below.
Always consult the CDC (cdc.gov) and the U.S. State Department (travel.state.gov) for current travel advisories and health recommendations before booking any international trip.
Frequently Asked Questions
What is the best international destination for a family vacation with young kids? Belize and Costa Rica are both excellent choices for families with young children. Both are short flights from the US, English is widely spoken, and both offer gentle outdoor activities appropriate for toddlers and young kids. Portugal is also ideal, with calm beaches, a low crime rate, and a very family-welcoming culture.
How do I find unique international destinations for family vacation beyond Paris and Rome? Start by looking at destinations that offer a combination of nature, history, and family-friendly infrastructure. Costa Rica, Belize, and Portugal consistently top family travel lists for exactly these reasons. Travel blogs, family travel agencies, and Facebook groups for family travel are excellent resources for honest, experience-based recommendations.
Is international travel with kids safe? International travel with kids is safe when you choose your destination carefully and prepare well. Stick to countries with stable governments, good tourist infrastructure, and access to quality healthcare. Always check the U.S. State Department travel advisories before booking and purchase comprehensive travel insurance for your family.
What is the most affordable international family vacation destination? Belize and Portugal are both highly affordable compared to other international options. In Belize, a family of four can travel comfortably for under $350 per day including accommodation, food, and activities. Portugal offers Europe-level experiences at a fraction of the cost of France, Italy, or the UK.
How far in advance should I book an international family vacation? For peak travel periods like summer and spring break, book six to nine months in advance to secure the best flights and accommodations. For travel in the shoulder season (May, September, October), three to four months is generally sufficient.
What vaccinations do my kids need for international travel? Vaccination requirements vary by destination. For Costa Rica, Belize, and Portugal, routine childhood vaccinations are generally sufficient for US travelers. Check the CDC travel health pages at cdc.gov for the most current destination-specific recommendations and consult your pediatrician at least six weeks before departure.
Do I need a passport for my kids for these destinations? Yes. All three destinations, Costa Rica, Portugal, and Belize, require a valid US passport for entry. Children must have their own passport. US child passports are valid for five years. Apply well in advance since processing times can run four to six weeks, longer during peak periods.
What is the best time of year for an international family vacation? For Costa Rica, December through April is ideal. For Portugal, May through June and September through October offer the best weather with fewer crowds. For Belize, December through April is the dry season and best for reef activities. Summer travel to all three is possible but comes with higher prices and, in Belize and Costa Rica, afternoon rain.
Thanks for visiting Fab Haute Mama
Non-Invasive Treatment for a Natural Look: The Busy Mom’s Guide to a Subtle, Refreshed Face
If your calendar is packed and your mirror keeps telling you that you look tired, you probably want the same thing most busy moms want. A non-invasive treatment for a natural look that does not change your face, does not require downtime, and actually fits into real life, not a fantasy wellness schedule.
The good news? That treatment exists, it is widely available, and it takes less time than a blowout. This guide breaks down everything you need to know, from what to ask for to what to expect, so you can walk in confident and walk out looking like the most rested version of yourself.
Table of Contents
Why Baby Botox Is the Best Non-Invasive Treatment for a Natural Look When You Are Busy
One of the most reliable, naturally-looking options available today is low-dose neuromodulator injections, commonly called “baby botox.” When done conservatively and placed well by a skilled provider, it softens the signals that read as stressed and tired without freezing your expression. The American Academy of Dermatology explains that botulinum toxin is injected into targeted muscles to temporarily relax them, which helps lines diminish, with results typically lasting three to four months.
What makes this the go-to non-invasive treatment for a natural look for busy moms is the combination of four things: short appointments that fit into school pickup schedules, predictable results you can plan around, minimal downtime so you are not hiding from the world, and buildable dosing that keeps the result subtle and reversible over time.
This is not about chasing perfection. It is about looking like you got a nap you did not actually get. If you are new to the med spa world and want a bigger-picture primer before booking, here is why every mama deserves a med spa day and how to choose the right one.
What Natural Should Actually Look Like (and How to Ask for It)
When you are pursuing a non-invasive treatment for a natural look, a natural result is not “no movement.” It is less tension, less creasing, and more softness in the places that make you look exhausted. Movement is what keeps you looking like yourself, and a skilled injector knows how to preserve it while still giving you a real result.
The 3 Phrases That Protect You from the Overdone Look
Walk into your appointment with these three phrases ready. They communicate exactly what you want and give your provider the direction they need to deliver it.
- “I want to look rested, not different.” This is the clearest brief you can give. It tells your injector that preservation matters more than perfection.
- “Please keep movement.” This signals that you want to maintain expressiveness. A natural result still smiles, still laughs, still raises an eyebrow.
- “Start low. We can add later.” Conservative dosing is always the right starting point. You can always book a touch-up two weeks out. You cannot instantly undo too much product.
These three phrases are your best protection against an outcome that does not feel like you. Use all three.
What Neuromodulators Treat, How Long They Last, and What to Expect
What They Treat Best
Neuromodulators are especially effective for dynamic lines, meaning the lines created by repeated facial movement over time. The Cleveland Clinic explains that botulinum toxin blocks nerve signals to muscles so that injected muscles cannot contract in the same way for a period of time. The most commonly addressed areas include the following.
- Glabellar lines (the “11s” between the brows) — these are the lines most associated with looking stressed or tense, even at rest
- Forehead lines — horizontal lines that can make you look worried or tired even when you feel fine
- Crow’s feet — the smile lines at the outer corners of the eyes that can look harsh in photographs
How Fast You Will See Results
Most people notice changes gradually over several days following treatment, with results fully settling in around the two-week mark. That is why many injectors offer a quick check-in appointment at about two weeks if any tweaks are needed. Do not judge your result on day three.
How Long Results Usually Last
The AAD notes that effects typically last about three to four months, and sometimes longer with consistent treatment over time. Your personal timeline depends on several factors including the dose and placement chosen by your provider, your individual metabolism, how expressive you naturally are, and how strong the treated muscles were to begin with. First-timers often find results fade a little faster, with subsequent treatments tending to last longer.
The Busy Mom Dosing Strategy: Less Product, Better Placement
If your goal is a natural-looking result, the strategy is not more product. It is smarter placement. A conservative injector focused on a non-invasive treatment for a natural look will prioritize the areas that shift your overall vibe the most, rather than treating everything at once.
- Glabella first. Softening the “11s” removes the resting tension that reads as stressed or unapproachable. It is the single biggest vibe shift per unit of product.
- Crow’s feet next. These soften squint lines that show up hard in photos and video calls, without touching the rest of your face.
- Light forehead dosing if at all. The forehead needs to be dosed carefully to avoid heaviness or brow drop. A good injector will be conservative here, especially on your first visit.
If you have never had injectables before, starting with just one area is a completely valid and smart approach. It keeps the result subtle, lets you learn how your face responds, and means you have room to build over time. For a broader look at what the non-invasive treatment menu looks like for moms, these 5 non-invasive beauty treatments built for mom life are worth a read.
Aftercare That Keeps Your Results Natural (and Prevents Problems)
Aftercare is where the “easy” part of this non-invasive treatment for a natural look actually lives. There is not much to do, but what you do matters in the first hours after your appointment. Getting this right protects your result and keeps you looking your best.
Simple Aftercare Rules to Follow
Always follow your provider’s specific instructions first, but these are the sensible, widely-recommended defaults that apply to most people after neuromodulator injections.
- Do not rub or massage the treated areas for the rest of the day. The AAD notes that rubbing can spread product to unintended areas and affect your result.
- Be gentle when cleansing and applying skincare. Light touch only on injection day. Avoid dragging or pressing on treated areas.
- Skip heavy facial tools and tight hats on the day of your treatment. Anything that puts pressure on the treated areas is a no.
- Avoid aggressive exfoliation or squeezing if you have a small bump or redness at an injection site. These typically resolve within hours.
- Buffer your schedule for big events. If you have a wedding, reunion, or photo shoot coming up, book your appointment at least two weeks before so results have fully settled.
Safety: How to Protect Yourself and Your Face
Neuromodulators are among the most performed cosmetic treatments in the world, but they are still medical treatments. The best non-invasive treatment for a natural look is one performed safely by a qualified, licensed professional in an appropriate clinical setting.
Choose the Right Setting
The AAD explicitly warns against receiving botulinum toxin injections in non-medical settings such as parties, salons, or someone’s home, and cautions that purchasing botulinum toxin products online puts your health at serious risk. Your face deserves a proper clinical environment with a trained, credentialed injector who knows your anatomy and can handle any complications.
If you want a practical guide on how to find a med spa that fits mom life and feels trustworthy, Fab Haute Mama’s guide on choosing the right med spa walks you through exactly what to look for. Always consult with a licensed provider before booking any treatment.
Common Side Effects to Know About
Most side effects are mild, temporary, and entirely manageable around a regular mom schedule. Common ones include mild swelling or redness at injection sites that typically clears within a few hours, a headache in the hours following treatment (many people experience none at all), bruising that varies by individual and can be minimized by avoiding blood thinners beforehand, and in rare cases, temporary eyelid or brow drooping that is usually technique-related and resolves on its own. Discuss your full medical history and any concerns with your provider before treatment.
If Your Goal Is Glow More Than Lines: Two Non-Invasive Add-Ons
Sometimes what you actually want is not fewer wrinkles. It is more radiance, smoother texture, and a more even tone. If dullness is your main concern, these two non-invasive options layer beautifully with a conservative neuromodulator plan and fit into a busy mom’s schedule without requiring significant downtime.
Microneedling for Texture, Pores, and Tone
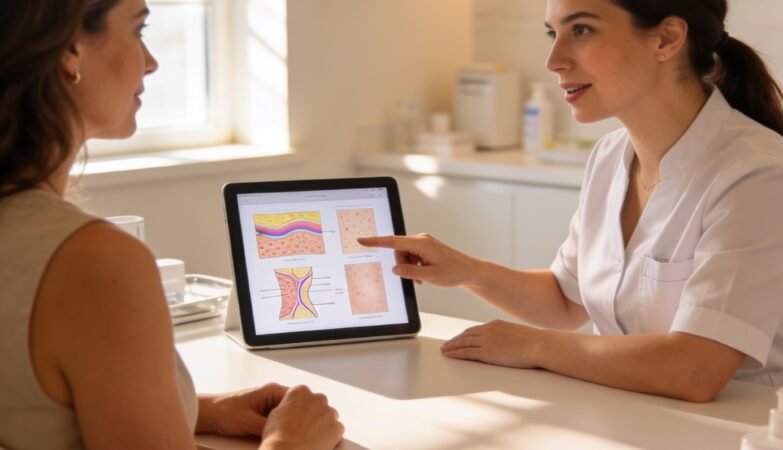
The AAD describes microneedling as a medical treatment using tiny needles that can help address acne scars, dark spots, large pores, and uneven texture. Yale Medicine also characterizes it as a minimally invasive, nonsurgical procedure performed in a dermatologist’s or licensed provider’s office. For moms dealing with postpartum skin changes, sun damage, or texture concerns, microneedling is one of the most efficient skin quality investments available.
For a mom-focused overview of glow-forward treatment options, Fab Haute Mama’s guide to glowing skin treatments that actually work is the companion read you need.
Light Chemical Peels for Brightness
Mayo Clinic explains that chemical peels remove the top layers of skin to reveal fresher, brighter skin underneath, and that with a light peel you may need more than one session to reach your desired result. The AAD also notes that some patients benefit from a pre-peel skincare plan for two to four weeks before treatment, and that results depend heavily on the skill of the provider performing the peel. A light peel is a realistic, low-downtime option for mamas who want more luminosity without committing to a longer recovery.
If you are in decision mode and want a broader treatment comparison, Fab Haute Mama’s 2026 med spa treatment roundup can help you find what fits your goals without the decision fatigue.
The Simplest Natural Look Plan for a Busy Mom
If you want the easiest version of this entire guide in one place, here it is. A tiered approach lets you start small, see how your skin responds, and layer in more only if you want to.
Step 1: Start with the One Thing That Gives the Biggest Payoff
For most busy moms pursuing a non-invasive treatment for a natural look, that is low-dose neuromodulators in the glabella (“11s”) or crow’s feet. One area. Conservative dosing. Two-week check-in if needed. That is it. Many mamas stop right there and love the result.
Step 2: Add Skin Quality Later If You Want It
If after a few rounds of neuromodulators you still want more brightness or smoother makeup application, that is when you layer in skin quality treatments. Microneedling is the most efficient add-on for overall skin texture and tone. A light chemical peel is the fastest path to luminosity. LED therapy is the gentlest option if you want something with zero downtime and no needles at all.
| Treatment | Best For | Downtime | How Often |
|---|---|---|---|
| Baby Botox (neuromodulator) | Lines, tension, tired look | None to minimal | Every 3 to 4 months |
| Microneedling | Texture, pores, tone, scars | 1 to 3 days of redness | Every 4 to 6 weeks |
| Light Chemical Peel | Brightness, mild pigmentation | Flaking for 2 to 5 days | Series of 3 to 6 |
| LED Therapy | Redness, mild collagen support | None | Weekly or monthly |
Key Takeaways
- The best non-invasive treatment for a natural look for busy moms is low-dose neuromodulators (baby botox), used conservatively and placed well.
- A natural result preserves movement. It reduces tension and creasing, not expression.
- Walk into every appointment with three phrases: “rested not different,” “keep movement,” and “start low.”
- Results settle around the two-week mark. A follow-up check-in is normal and smart.
- Aftercare is simple: no rubbing, gentle skincare, skip the face tools on treatment day.
- Always choose a qualified provider in a clinical setting. Avoid non-medical environments.
- If your goal is glow over lines, microneedling and light chemical peels are powerful, low-downtime add-ons.
- You do not need to do everything at once. Start with one area, learn how your face responds, and build from there.
A mom once said she did not want to look younger. She just wanted to stop hearing “you look tired” when she felt fine. After conservative treatment on her “11s,” she said, “I look calm even when my day is chaos.” That is the win. Tiny change. Big impact.
Found this helpful? Share it with a mama who needs it, and drop your biggest skin question in the comments below.
Always consult with a licensed provider before booking any treatment. This article is for informational purposes only and does not constitute medical advice.
Frequently Asked Questions
What is the best non-invasive treatment for a natural look?
For most busy moms, low-dose neuromodulator injections (baby botox) are the best non-invasive treatment for a natural look. When dosed conservatively and placed well, they soften lines and reduce the resting tension that makes you look tired, without freezing your expression or changing your face. Results last three to four months and require little to no downtime.
What is baby botox and how is it different from regular botox?
Baby botox refers to a conservative, lower-dose approach to neuromodulator injections. The product is the same, but the amount used is smaller and the placement is more targeted. The goal is subtle softening rather than maximum smoothing. It is the preferred approach for anyone who wants to look refreshed rather than “done.”
How long does a non-invasive treatment for a natural look last?
The American Academy of Dermatology notes that neuromodulator results typically last three to four months. Your personal timeline depends on the dose used, your metabolism, how expressive you naturally are, and how strong the treated muscles are. Many people find results last a little longer with consistent treatment over time.
Is there any downtime after baby botox?
Downtime is minimal for most people. You may have a small amount of redness or swelling at the injection sites that clears within a few hours. Most mamas go straight back to their day. The main aftercare rules are to avoid rubbing the treated areas and to be gentle with skincare on treatment day.
How do I ask for a natural result at my appointment?
Use these three phrases: “I want to look rested, not different,” “please keep movement,” and “start low, we can add later.” These communicate exactly what a natural result means and give your injector clear direction. A skilled provider will work with your anatomy to deliver softness without stiffness.
Where should you not get botox injections?
The American Academy of Dermatology warns against receiving botulinum toxin injections in non-medical settings including parties, salons, and private homes. Purchasing products online also carries serious health risks. Always choose a licensed, credentialed provider in a proper clinical or medical spa setting.
What non-invasive treatments are good for skin glow and texture?
If your primary concern is dullness, texture, or uneven tone rather than lines, microneedling and light chemical peels are two excellent non-invasive options. Microneedling addresses pores, scars, and overall texture. Light peels boost brightness and luminosity. Both can be layered with a conservative neuromodulator plan for a comprehensive natural look approach.
How do I find a trustworthy med spa for non-invasive treatments?
Look for a med spa with licensed, credentialed injectors (nurse practitioners, physician assistants, or physicians), a clinical environment, transparent pricing, and a provider who takes time to understand your goals before recommending anything. Avoid anywhere that pushes maximum product on a first visit. A good injector’s first recommendation should always be conservative.

ablative laseracne scarring treatmentaftercare routineanti-aging skin careBeauty Treatmentsbusy mom skin carechemical peelcollagen remodelingdarker skin tonesenlarged poresFitzpatrick skin typefractional CO2 laserFraxellaser skin treatmentmed spa consultMed Spa Treatmentsmed spa treatmentsmedium chemical peelmelasma treatmentmicroneedlingmineral sunscreenMorpheus8non-ablative laserpicosecond laserPicoSurePIHpreconditioningprovider checklistretinoid restartRF microneedlingSkin Careskin care for moms over 35skin care treatmentskin care treatment for momsskin laxityskin of colorskin resurfacingskin textureSkinPensuperficial chemical peelTCA peeltest spottreatment downtimetreatment sequencingVI Peel
Which Skin Care Treatment Is Right for You? Peels vs. Microneedling vs. Lasers
Which skin care treatment for moms? Choosing the right skin care treatment as a busy mom is less about which procedure is most popular and more about which one matches your actual concern, skin tone, schedule, and recovery window. This guide gives you the evidence-based comparison you need to walk into any consult prepared.
TL;DR
- Match treatment to tissue depth: surface pigment and dullness need peels; scarring and laxity need microneedling or lasers
- Best for minimal downtime: superficial chemical peels or Clear + Brilliant — repeatable, low-risk, lowest cost
- Best for acne scarring and texture: microneedling series (3–4 sessions) or RF microneedling for deeper remodeling
- Best for melasma: medical topicals first, conservative peels second — avoid aggressive lasers until preconditioning is complete
- Best for deep wrinkles: ablative fractional CO2 — dramatic single-session result, 7–14 days recovery, physician-level oversight required
- Darker skin tones (Fitzpatrick IV–VI): insist on test spots and preconditioning; staged microneedling and light peels are safer first-line options
- Sequencing rule: 2–4 weeks after a superficial peel before microneedling; 4–8 weeks between laser sessions
- Aftercare is not optional: mineral SPF 30+ daily plus staged retinoid reintroduction determines whether results last
Table of Contents
How to Choose the Right Skin Care Treatment as a Busy Mom
The right skin care treatment for a busy mom comes down to three things: your primary skin concern, how much downtime you can realistically absorb, and your skin tone. Match the treatment mechanism to the tissue layer driving your complaint — surface pigment and dullness need different tools than deep scarring or laxity. Staged, lower-intensity plans almost always fit mom life better than a single aggressive procedure.
The most common mistake is chasing maximum intensity. Many clinics push high-energy resurfacing because it looks dramatic in before-and-afters. In practice, three to four conservative sessions (superficial peels or microneedling) can deliver comparable long-term satisfaction at similar or lower cost — with fewer complications that derail your schedule.
Think in layers: epidermal problems (surface pigment, dullness, mild texture) need gentler surface tools; dermal problems (deep scarring, laxity, significant wrinkles) need deeper collagen-stimulating approaches. Getting that match right is more important than which device sounds most impressive at your consult.
Quick Decision Guide — Which Skin Care Treatment Fits Your Top Priority
Start with your single biggest goal and pick the treatment that directly targets it.
| Primary Concern | Best First-Line Treatment | Downtime | Cost Range |
|---|---|---|---|
| Immediate glow, minimal downtime | Superficial chemical peel or Clear + Brilliant | 0–3 days | $100–$400 |
| Acne scarring and texture | Microneedling series (SkinPen) | 24–72 hours per session | $200–$500/session |
| Deeper scarring and mild laxity | RF microneedling (Morpheus8) | 2–5 days | $500–$800/session |
| Stubborn pigmentation or melasma | Medical topicals + conservative superficial peels | 2–4 days | $100–$300/session |
| Vascular redness and sunspots (lighter skin) | IPL or non-ablative fractional laser | 2–5 days | $400–$900/session |
| Deep wrinkles and severe sun damage | Ablative fractional CO2 | 7–14 days | $2,000–$5,000 |
| Discrete brown spots | Picosecond laser | 1–5 days | $500–$2,000 |
Real-world example: A 38-year-old mom with Fitzpatrick IV skin, rolling acne scars, and limited childcare picked a series of four SkinPen microneedling sessions with topical brightening preconditioning spaced four weeks apart. Her provider avoided ablative lasers because of PIH risk and bundled post-care supplies to minimize return visits. The staged approach fit her schedule and delivered progressive improvement without a single large downtime block.
Chemical Peels — What Moms Need to Know
Chemical peels are the fastest med spa tool for predictable surface improvement — better tone, faded superficial pigment, and mild line reduction — but effectiveness and risk change sharply with depth. Superficial peels are the low-disruption entry point for busy schedules; medium and deep peels increase results and downtime and require stricter medical oversight.
Superficial Peels — The Low-Disruption Starting Point
Superficial peels (glycolic, lactic, salicylic acid) remove the outermost skin layers to improve dullness, mild sun damage, surface texture, and acne-prone skin. Recovery is predictable — two to four days of mild flaking — and the treatment is repeatable every three to six weeks. They are the correct first choice for moms who want visible improvement without taking time off.
The practical advantage of superficial peels is consistency. A series of four to six sessions delivers comparable long-term tone improvement to one medium peel — with fewer logistics, lower risk, and no need for a week of wound care. For moms with Fitzpatrick IV–VI skin, serial light peels with careful preconditioning are significantly safer than one aggressive procedure.
- Best for: Dullness, mild sun damage, surface pigmentation, acne-prone skin, uneven texture
- Downtime: 2–4 days mild flaking
- Cost: $100–$300 per session
- Cadence: Every 3–6 weeks
Medium-Depth Peels — When You Want More Than Surface Improvement
Medium-depth peels (TCA, VI Peel, Obagi Blue Peel) penetrate into the upper dermis to address thicker sunspots, fine lines, and more significant pigmentation. Expect five to ten days of visible peeling, social avoidance, and strict pre and post medical care. These belong on a Friday before a school break — not the week of a work presentation.
Ask specifically about preconditioning requirements before booking a medium peel. Most providers require four to six weeks of topical preparation (retinoids, antioxidants, SPF) before a TCA peel to improve results and reduce complication risk. For darker skin tones, a test spot is mandatory before any full-face medium peel.
- Best for: Thicker sunspots, fine lines, more significant pigmentation, early texture
- Downtime: 5–10 days
- Cost: $300–$800 per session
- Important: Requires preconditioning and, for medium-deep options, physician oversight
Who Should Avoid Aggressive Peels
- Moms currently pregnant or breastfeeding — defer medium and deep peels; confirm superficial options with your OB
- Fitzpatrick IV–VI without a confirmed test spot and preconditioning plan
- Recent isotretinoin use within the last 6 months
- Active open wounds, uncontrolled rosacea, or active cold sores
Chemical Peel Comparison
| Peel Type | Acids Used | Downtime | Best For | Cost |
|---|---|---|---|---|
| Superficial | Glycolic, lactic, salicylic | 2–4 days | Dullness, mild pigment, texture | $100–$300 |
| Medium | TCA, VI Peel, Obagi Blue | 5–10 days | Fine lines, thicker pigment | $300–$800 |
| Deep | Phenol | 10–14+ days | Severe wrinkles | $1,000–$3,000+ |
Microneedling and RF Microneedling — Practical Guide for Moms
Microneedling remodels collagen through controlled micro-injury; adding radiofrequency delivers targeted heat to the deep dermis for tightening and deeper remodeling. The choice between them depends on the depth of the concern, your tolerance for cost and discomfort, and whether laxity is part of the picture.
How Microneedling Works — and Why Needle Depth Matters
Needle depth is not a single setting — it should be mapped to each zone of the face based on the concern being treated. Short needles improve surface smoothness and product absorption; medium-length needles remodel enlarged pores and shallow scarring; the longest needles reach mid-to-deep dermis where rolling and boxcar scars live.
Automated pens (SkinPen, Dermapen) provide controlled depth per pass and are the safer, more reproducible choice over stamping rollers. Operator technique — depth choices, number of passes, and sterile handling — influences outcomes more than the device brand. Ask for documentation of which settings were used at each session so subsequent providers can build on previous work.
One session is not enough. Meaningful texture change requires multiple spaced sessions, consistent sun protection, and maintenance topicals. Plan a series of three to four sessions spaced four to six weeks apart, then reassess.
When to Choose RF Microneedling Instead
RF microneedling adds thermal remodeling below the surface, producing contraction and collagen tightening that mechanical needling alone cannot achieve. It is the better choice when mild laxity, jawline definition, or deeper scar remodeling is part of the goal.
The tradeoff is higher cost per session, more discomfort, and sometimes a longer recovery window than standard microneedling. It is not necessary for everyone — if your primary complaint is texture and enlarged pores with no laxity concern, mechanical microneedling at lower cost delivers the better risk-to-reward ratio.
- Choose mechanical microneedling when: the concern is primarily texture, enlarged pores, and superficial scarring
- Choose RF microneedling when: mild laxity, jawline refinement, or deeper scar patterns are also present
Microneedling Comparison
| Type | Mechanism | Downtime | Best For | Cost Per Session |
|---|---|---|---|---|
| Mechanical (SkinPen) | Collagen induction via micro-injury | 24–72 hours | Texture, pores, mild scarring | $200–$500 |
| RF microneedling (Morpheus8) | Micro-injury + radiofrequency heat | 2–5 days | Laxity, deeper scarring, tightening | $500–$800 |
Avoid microneedling if: active cystic acne, open wounds, recent isotretinoin use without clinician sign-off, or unverified biologic add-ons in non-sterile conditions.
On PRP add-ons: PRP can boost results but also increases infection and inflammation risk when sterility or product choice is poor. Insist on sterile technique and ask exactly what is being introduced into the skin before agreeing.
Laser Skin Treatments Explained
Lasers are not interchangeable. Each class solves different problems and carries distinct recovery and pigment risks. Understanding the difference prevents choosing a dramatic-sounding procedure that does not match your actual concern.
Non-Ablative Fractional Lasers (Fraxel)
Non-ablative fractional lasers create microscopic zones of thermal injury while leaving the surface largely intact, producing steady improvement in texture and mild wrinkle softening with three to seven days of redness and social downtime. They are the most accessible laser option for moms who want real resurfacing improvement without the logistics of ablative recovery.
Multiple sessions are usually needed — most non-ablative courses run two to five treatments spaced four to eight weeks apart. Results build progressively rather than appearing dramatically after one session.
- Best for: Moderate texture, mild wrinkles, early sun damage
- Downtime: 3–7 days redness
- Cost: $600–$2,000 per session
Ablative CO2 Lasers — The Heavy Hitter
Ablative fractional CO2 (Lumenis UltraPulse) vaporizes columns of tissue to produce the deepest, longest-lasting resurfacing available at a med spa. Results for deep creases and severe sun damage are dramatic — but expect a week or more of open healing, strict wound care, and a significant risk of scarring or pigment change if the operator is inexperienced.
This is a medical procedure. Physician oversight is not optional. Plan childcare for the full recovery window, not just the worst two days. For busy moms who cannot commit to seven to fourteen days of wound care, staged non-ablative or combined approaches often deliver better real-world satisfaction with less risk.
- Best for: Deep wrinkles, severe sun damage, significant resurfacing (lighter skin tones)
- Downtime: 7–14+ days
- Cost: $2,000–$5,000 per session
Picosecond Lasers — The Pigment Specialist
Picosecond devices (PicoSure) use photomechanical disruption rather than heat to break up pigment and ink. They are the most efficient targeted option for stubborn brown spots and discrete hyperpigmentation, often with shorter visible recovery than ablative options.
What picosecond lasers are not: a universal anti-aging fix or an automatically safe option for all skin tones. Despite frequent marketing claims, picosecond treatments can still trigger PIH on darker skin and require test spots and topical preconditioning. Choose a provider who specifically addresses your Fitzpatrick type before agreeing to a full-face session.
- Best for: Discrete brown spots, sunspots, melasma (with preconditioning), stubborn pigmentation
- Downtime: 1–5 days depending on settings
- Cost: $500–$2,000 per session
Laser Comparison
| Laser Type | Mechanism | Downtime | Best For | Cost |
|---|---|---|---|---|
| Non-ablative fractional (Fraxel) | Thermal zones, surface intact | 3–7 days | Texture, mild wrinkles, early sun damage | $600–$2,000/session |
| Ablative fractional CO2 | Tissue vaporization | 7–14+ days | Deep wrinkles, severe sun damage | $2,000–$5,000 |
| Picosecond (PicoSure) | Photomechanical pigment disruption | 1–5 days | Brown spots, discrete pigmentation | $500–$2,000 |
How to Match Your Skin Concern to the Right Treatment
| Skin Concern | Tissue Layer | Best Starting Treatment | Escalation Path |
|---|---|---|---|
| Surface pigment, dullness | Epidermal | Superficial chemical peel + vitamin C | Picosecond laser if persistent |
| Enlarged pores, early texture | Epidermal/dermal | Mechanical microneedling | Add RF microneedling if laxity develops |
| Acne scarring (rolling/boxcar) | Dermal | Microneedling series | RF microneedling or non-ablative laser |
| Deep wrinkles, marked laxity | Deep dermal | Non-ablative laser + RF microneedling | Ablative CO2 when recovery is plannable |
| Hormonal melasma | Epidermal | Medical topicals + strict SPF | Conservative peel or pico only after stability |
| Vascular redness/sunspots | Epidermal | IPL photofacial | Non-ablative laser if needed |
How to Sequence Skin Care Treatments Without Conflicts
Treatment sequencing matters as much as treatment selection. Allow the inflammatory window to close fully between procedures — wait 2–4 weeks after a superficial peel before microneedling, 4–8 weeks between non-ablative laser sessions, and several months before ablative resurfacing after any recent procedure. Overlapping inflammatory treatments increases the risk of prolonged redness and pigment shifts.
A practical sequencing approach for most moms: complete a series of microneedling or peels first, assess results at three months, then add a targeted laser for residual pigment or a single RF session for laxity. Rushing combinations is where complications start.
Practical sequencing rules:
- Superficial peel to microneedling: wait 2–4 weeks
- Non-ablative laser sessions: 4–8 weeks between
- Ablative CO2 after any recent procedure: wait several months
- Botox or fillers after a peel: wait 1 week (superficial) to 2 weeks (medium)
- Never layer treatments that create overlapping open healing windows
Scheduling, Budgeting, and Downtime Planning for Busy Moms
Planning a skin care treatment is logistics as much as medicine. Choose the treatment you can actually complete and maintain — not the most dramatic option on the clinic menu.
Schedule like a project: Block actual recovery days on your calendar before you book. Include travel time, a consult or test-spot visit, the treatment day, and the highest-symptom window when you will need help with childcare.
Scheduling hacks:
- Book first thing Friday so the weekend covers early redness
- Ask for a written worst-case symptom day and arrange childcare for that day only
- Combine the consult and test-spot on the same visit to cut trips
- Ask whether follow-ups can be done via video to avoid extra clinic travel
The True Cost of a Skin Care Treatment
The clinic invoice is only part of the bill. Plan your total budget before booking:
| Hidden Cost | Why It Matters |
|---|---|
| Preconditioning topicals | Required 4–6 weeks before many peels and lasers; not always included in quoted price |
| Recovery kit | Barrier ointment, mineral SPF, prescribed topicals — essential for results |
| Childcare during peak recovery | You may need day help on worst-symptom days |
| Repeat sessions | Most non-ablative plans require 3–5 sessions; budget for the series, not one appointment |
| Sunscreen replacement | Replace every 2 months post-resurfacing; ongoing maintenance cost |
Financial tip: Request an itemized quote that separates device fees, consumables, and physician supervision so you can compare clinics on equal footing.
How to Choose a Qualified Provider — Checklist and Red Flags
Your results and safety depend far more on the operator and clinic process than on the device brand. Verify credentials, case volume, and documentation before booking anything.
Provider verification checklist:
- Who performs the procedure? Board-certified dermatologist or plastic surgeon, PA or nurse under direct physician supervision, or non-clinician? Ask for official credentials and verify state license number.
- Can you show before-and-after photos of at least three patients with my skin tone and concern?
- What is the exact device model and when was it last serviced?
- What is your test-spot policy for pigment-prone or darker skin?
- What sterile disposable protocol do you use (single-use needles/cartridges)?
- What is your on-site or on-call physician protocol for complications?
- Do you provide a written aftercare plan with specific products and restart timelines?
Red flags — stop the booking:
- Pressure to choose higher energy or deeper peel on the first visit without a trial or clear rationale
- No written aftercare plan or emergency contact information
- No before-and-after photos for your skin tone
- Blanket guarantees or pricing significantly below market rate for complex resurfacing
- Refusal to perform a test spot for laser on darker skin tones
- Cannot name the specific device model being used
Real-world example: A 39-year-old mom with Fitzpatrick V skin booked a laser consult. The clinic tech could not show before-and-afters on similar skin and said a full-face pico treatment would be fine without a test spot. She postponed, got a dermatologist referral, and chose a clinic that performed a test spot plus four weeks of topical preconditioning before any full treatment. The conservative route prevented a weeks-long patchy hyperpigmentation episode.
For a deeper read on how home skincare supports and extends injectable results, Express Med Spa breaks down the three skincare steps most people skip after Botox — the same foundation this guide recommends for lasting results.
Aftercare and Maintenance to Protect Your Results
The procedure stops being an investment the moment aftercare is treated as optional. Proper post-treatment routines and scheduled maintenance convert a short-lived improvement into lasting change — and they are the single biggest determinant of whether you need repeat corrective work.
When to Restart Actives, Makeup, and Exercise
| Treatment | Retinoid Restart | Makeup | Exercise |
|---|---|---|---|
| Superficial peel | 7–10 days | 24–48 hours | 48 hours (light only) |
| Medium peel | 2–3 weeks | 5–7 days | 1 week |
| Mechanical microneedling | 7–10 days | 24–72 hours | 48 hours (light only) |
| RF microneedling | 7–10 days | 48–72 hours | 3–5 days |
| Non-ablative laser | 2–3 weeks | 3–5 days | 3–5 days |
| Ablative CO2 | Several weeks; clinician clearance | 10–14 days | 2+ weeks |
Sun protection is non-negotiable. Use mineral SPF 30+ daily and a wide-brim hat after any resurfacing work. Replace sunscreen every two months if pigment was your primary concern. An antioxidant vitamin C serum in the morning routine extends and amplifies results from every treatment.
Maintenance Cadence by Treatment Type
- Superficial peels: quarterly for ongoing glow; monthly only if clinician approves
- Microneedling touch-up: every 6–12 months to preserve collagen gains
- Non-ablative fractional laser: annually or biennially depending on photoaging and lifestyle
- Topical maintenance: daily SPF, nightly gentle retinoid (when cleared), weekly hydrating mask for barrier recovery
Post-treatment recovery kit — pack before your appointment:
- Gentle hydrating cleanser (CeraVe Hydrating, La Roche-Posay Toleriane)
- Petrolatum or clinician-recommended barrier ointment
- Mineral sunscreen SPF 30+ (EltaMD UV Physical, CeraVe Mineral SPF 30)
- Plain hyaluronic acid serum (Vichy Mineral 89, Neutrogena Hydro Boost)
- Clinician-approved topical for pigment if prescribed (azelaic acid, tranexamic acid)
For a full walkthrough of the at-home routine that supports and extends every in-office treatment, see our skin care routine for busy moms guide.
Key Takeaways
- The right skin care treatment for moms matches the tissue layer driving the concern — not the most dramatic option available
- Superficial chemical peels are the best low-disruption starting point for surface pigment, dullness, and mild texture
- Microneedling is the most versatile and skin-tone-safe option for texture and scarring; RF microneedling adds tightening when laxity is also a concern
- Lasers are not interchangeable — non-ablative for moderate resurfacing, ablative CO2 for deep wrinkles, picosecond for discrete pigment
- Melasma requires a medical-first approach — topicals and strict SPF before any laser, conservative peels only with preconditioning
- Darker skin tones: insist on test spots and staged plans; avoid aggressive ablative lasers without specialist oversight
- Sequencing rules prevent complications — respect the inflammatory windows between procedures
- Aftercare is the single biggest determinant of lasting results — mineral SPF daily and staged retinoid reintroduction are non-negotiable
- Provider selection matters more than device brand — credentials, case volume on similar skin tones, and a written aftercare plan are the real quality signals
Frequently Asked Questions
What is the best skin care treatment for busy moms?
The best skin care treatment for busy moms matches their primary concern with the recovery window they can realistically manage. For minimal disruption, superficial chemical peels and mechanical microneedling deliver the best risk-to-reward ratio. For deeper structural change, RF microneedling or a non-ablative laser series is the strongest collagen-stimulating option. Staged plans almost always fit mom life better than single aggressive procedures.
Should I get a chemical peel or microneedling?
Chemical peels are best for epidermal concerns — surface pigment, dullness, and mild texture. Microneedling is better for dermal concerns — acne scarring, enlarged pores, and collagen remodeling. If your primary complaint is uneven tone and dullness, start with a peel series. If your primary complaint is texture or scarring, start with microneedling. Many moms benefit from both in a sequenced plan.
Are lasers safe for darker skin tones?
Some lasers are safer than others for darker skin tones. Mechanical microneedling and superficial peels are generally the safer first-line options for Fitzpatrick IV–VI. Non-ablative fractional and picosecond lasers can be used with appropriate settings and preconditioning, but aggressive ablative CO2 lasers carry significantly higher PIH risk and should only be performed under a board-certified dermatologist with a mandatory test-spot protocol and preconditioning plan.
How do I choose between RF microneedling and a laser?
Choose RF microneedling when texture, pores, and mild laxity are the primary concerns and you want to avoid laser recovery time. Choose a non-ablative laser when texture improvement with more significant wrinkle reduction is the goal and you can manage three to seven days of social downtime. Choose ablative CO2 only when deep wrinkles and severe sun damage require maximum resurfacing and you can commit to a full recovery window.
Can I combine skin care treatments in the same month?
Yes, but sequencing rules matter. Complete a series of one treatment type first, assess results, then add a second targeted procedure. Never overlap inflammatory recovery windows — wait two to four weeks after a superficial peel before microneedling, and four to eight weeks between laser sessions. Rushing combinations is where pigment complications and prolonged redness start.
How long is recovery after a chemical peel or laser?
Superficial peels: two to four days of mild flaking. Medium peels: five to ten days of visible peeling. Non-ablative fractional laser: three to seven days of redness. Ablative CO2: seven to fourteen or more days of wound care. Picosecond laser: one to five days depending on settings. Microneedling: twenty-four to seventy-two hours of redness.
What should I ask at a med spa consultation?
Ask for the specific device model and when it was last serviced, at least three before-and-after photos of patients with your skin tone, the exact downtime in days, their test-spot protocol for your skin tone, a full itemized cost breakdown including preconditioning and aftercare, who performs the treatment and their credentials, and their protocol if you experience a complication. If any of these questions are deflected, seek a second opinion.
How do I maintain results after a skin care treatment?
Daily mineral SPF 30+ is the single most important maintenance step — it prevents new damage and protects results from every in-office treatment. Reintroduce retinoids gradually after the clinician-recommended restart window. Schedule maintenance sessions on the appropriate cadence for your treatment type: quarterly peels, six to twelve month microneedling touch-ups, annual non-ablative laser. A consistent at-home routine amplifies and extends every in-office result.
This post is for informational purposes only and is not a substitute for professional medical or dermatological advice. Always consult a board-certified clinician before beginning any in-office skin care treatment, especially if you have darker skin, are pregnant, are breastfeeding, or take prescription medications.

anti-aging skincareat-home skincare routineazelaic acidBeauty TreatmentsBotoxbusy mom skincareceramide moisturizerchemical peelcollagen stimulationglowing skinglowing skin tipsglowing skin tips for momsHydrafacialIPL photofaciallaser resurfacingmed spa consultMed Spa Treatmentsmed spa treatmentsmicroneedlingniacinamidepostpartum skincarepregnancy skincareretinoid routineskin barrierSkin Careskin of colorskin radianceskin textureskin toneskincare roadmapvitamin C serum
How to Get Glowing Skin as a Busy Mom: Med Spa Treatments and At-Home Habits That Actually Work
Glowing skin tips for moms all point to the same truth: real radiance is not the result of one powerful treatment or a 12-step routine. For busy moms it comes from stacking the right habits with the right procedures in the right order. This guide gives you a practical roadmap — with real timelines, honest costs, and safety notes for pregnancy and darker skin tones.
TL;DR
- Glow ROI rule: Protect first — daily SPF and vitamin C before any procedure
- Zero downtime: Hydrafacial or superficial peel for immediate radiance when you cannot miss a day
- Medium window (6–12 weeks): Gentle peel series or microneedling plus vitamin C and retinoid adoption
- Structural glow (3–6 months): Laser resurfacing or combined resurfacing plan timed around family obligations
- Active pairing: Vitamin C in the AM, retinoid at PM — never both at night
- After microneedling: Restart retinoids after 3–7 days once redness and tightness settle
- Darker skin tones: Insist on test spots and a provider using Fitzpatrick IV–VI validated device settings
- Pregnant or breastfeeding: Skip retinoids and energy-based procedures; safe stack is SPF, antioxidant serum, and gentle hydration
Table of Contents
The Glowing Skin Principle Every Busy Mom Needs First
The fastest path to glowing skin is not the most aggressive treatment — it is matching your approach to your actual time, budget, and downtime tolerance. Protect first with daily SPF and a vitamin C serum, then layer in the med spa procedure that addresses your single biggest barrier. This sequence consistently outperforms chasing trendy treatments without a plan.
The most common glowing skin mistake is skipping the foundation. A Hydrafacial on unprotected, dehydrated skin that goes home to no SPF and no actives produces temporary results. The same treatment on skin that is daily-SPF-protected and vitamin C-primed produces better results that last longer.
Think of glowing skin as a two-part system: protect and preserve (your daily routine) and boost and rebuild (your in-office treatments). Both parts are required. Neither works well without the other.
The American Academy of Dermatology recommends broad-spectrum SPF 30 or higher as the single most effective daily habit for preventing visible skin aging — making it the smartest first investment in any glowing skin routine.

Build Your Glowing Skin Roadmap in 4 Steps
A roadmap that respects your real constraints beats a long wishlist every time. Four steps get you from where you are to a plan you will actually follow.
Step 1 — Take the Mini Skin Assessment
Before booking anything, clarify what you are actually working with:
- Primary concern: Uneven texture, pigmentation, volume loss, acne scarring, or general dehydration and dullness
- Skin background: Oily, dry, combination, sensitive, or history of PIH
- Life constraints: Available appointment time per month, downtime tolerance, and monthly budget
- Medical flags: Pregnancy or breastfeeding, recent isotretinoin use, or active skin infections
Answering these four questions takes five minutes and will do more to focus your treatment plan than any consultation alone.
Step 2 — Identify Your Glow ROI Priority
Glow ROI means investing first where one hour or one product produces the largest visible change. In practice that means getting SPF and vitamin C into your daily routine before spending money on any procedure. The research is consistent: sun protection prevents the damage that makes skin look dull and aged; without it, every treatment result degrades faster.
Once protection is in place, identify your single largest barrier to glowing skin — texture, pigmentation, dehydration, or laxity — and choose one procedure that targets it directly. Resist the urge to address everything at once.
Step 3 — Match a Timeline to Your Schedule
Your available recovery window determines your treatment tier more than any other factor:
| Timeline | Treatment Option | What to Expect |
|---|---|---|
| 1 week or less | Hydrafacial, superficial peel, dermaplaning | Immediate surface radiance, zero to minimal downtime |
| 6–12 weeks | Gentle peel series, microneedling series + actives | Progressive texture and tone improvement |
| 3–6 months | Laser resurfacing, combined filler + resurfacing | Structural skin change; plan around family obligations |
Real-world example: A 38-year-old mom with uneven tone and two school-aged children can commit to one monthly 60-minute appointment. Her roadmap: start daily SPF and vitamin C immediately, book a superficial chemical peel series, and schedule microneedling three times over 12 weeks during school term when a weekend recovery window is predictable. She sees visible brightening in weeks and saves aggressive laser work for later if more correction is needed.
Step 4 — Take Your Baseline Photos Today
This step gets skipped most often and matters more than any product. Photograph your face in natural light, no filter, no makeup, same angle. Repeat every four weeks. Skin changes gradually enough that your eyes miss them day to day. Photos are the only reliable way to see the cumulative impact of your routine and treatments over time.
The At-Home Glowing Skin Routine
The home routine is not a supporting role. It is half the system. Med spa treatments boost and rebuild; your daily habits protect and extend those results. Without a consistent at-home routine, in-office treatments fade faster and cost more per visible result.
Morning: Protect and Brighten
The AM routine has one job: get antioxidant protection and broad-spectrum SPF onto the skin before UV and environmental exposure begins.
- Gentle cleanser — non-stripping, hydrating (CeraVe Hydrating, La Roche-Posay Toleriane)
- Vitamin C serum — brightening antioxidant; applied before moisturizer (SkinCeuticals C E Ferulic for clinical strength; The Ordinary Ascorbyl Glucoside 12% for a stable budget option)
- Hyaluronic acid hydrator — applied to slightly damp skin (Vichy Mineral 89, Neutrogena Hydro Boost)
- Ceramide or peptide moisturizer — barrier support and functional anti-aging (Olay Regenerist, CeraVe AM)
- Broad-spectrum SPF 30–50 — non-negotiable final step (EltaMD UV Clear SPF 46, La Roche-Posay Anthelios SPF 60)
Evening: Repair and Renew
The PM routine has one job: deliver your most active ingredient, the retinoid, to clean, dry skin and support the skin barrier overnight.
- Gentle cleanser — remove SPF, makeup, and pollution residue fully before actives
- Retinoid — start every other night for the first 2–4 weeks (Differin Adapalene 0.1% OTC; tretinoin by prescription for faster results)
- Barrier moisturizer — ceramide-rich, applied immediately after retinoid to buffer irritation (CeraVe Moisturizing Cream, Vanicream)
At-Home Routine at a Glance
| Time | Step | Category | Example Products |
|---|---|---|---|
| AM | Cleanser | Hydrating, gentle | CeraVe Hydrating, La Roche-Posay Toleriane |
| AM | Vitamin C serum | Antioxidant | SkinCeuticals C E Ferulic, The Ordinary AG 12% |
| AM | HA hydrator | Humectant | Vichy Mineral 89, Neutrogena Hydro Boost |
| AM | Moisturizer | Ceramide/peptide | CeraVe AM, Olay Regenerist |
| AM | SPF 30–50 | Broad-spectrum sunscreen | EltaMD UV Clear, La Roche-Posay Anthelios |
| PM | Cleanser | Thorough but gentle | Same as AM or oil-based first if wearing makeup |
| PM | Retinoid | Cell turnover/collagen | Differin 0.1%, tretinoin (Rx) |
| PM | Barrier moisturizer | Ceramide buffer | CeraVe Moisturizing Cream, Vanicream |
For a fully detailed breakdown of each step, timing, and product selection by budget, see our complete skin care routine for busy moms.
Best Med Spa Treatments for Glowing Skin
In-office treatments accelerate what your home routine cannot do alone. The right procedure depends on your timeline, skin concern, and downtime window — not the most popular treatment at the clinic.
Hydrafacial — Immediate Radiance, Zero Downtime
Hydrafacial is the highest-convenience glowing skin treatment available. In 30–45 minutes it exfoliates, extracts, and infuses targeted serums to produce same-day brightness and cleaner pores with essentially no recovery. It is the correct first choice when you need visible improvement before an event, have zero downtime to spare, or want a reliable monthly maintenance anchor.
What Hydrafacial does not do: rebuild collagen, tighten lax skin, or produce lasting improvement in deep texture or pigmentation. Treat it as your maintenance layer, not your primary correction tool.
Best for: Immediate glow, pore cleansing, pre-event radiance, monthly maintenance Time: 30–45 minutesDowntime: NoneCost: $150–$300
Superficial Chemical Peels — Tone and Texture in a Weekend
Superficial peels (glycolic, lactic, mandelic) exfoliate the outermost skin layer, producing visible improvement in tone, texture, and dullness with 2–4 days of mild flaking. They are the most accessible step up from Hydrafacial for moms who can absorb a short weekend recovery and want more meaningful pigment or texture improvement.
Schedule a superficial peel at least 10–14 days before any important event to allow the flaking phase to complete and the glow to fully emerge. Do not combine with laser or injection treatments in the same week without confirming the timing with your provider.
Best for: Mild pigmentation, dullness, uneven tone, surface texture Time: 30–45 minutesDowntime: 2–4 days mild flakingCost: $100–$300
Microneedling — The Medium-Window Glow Builder
Microneedling creates controlled micro-injuries to trigger collagen production, producing progressive improvement in texture, tone, and radiance over a series of sessions. Most plans involve 3 sessions spaced 4–6 weeks apart, with visible results building over 3–6 months as collagen remodeling completes.
It is one of the most skin-tone-safe collagen-stimulating options available, making it a strong choice for moms with Fitzpatrick III–VI skin who want meaningful texture improvement without the higher PIH risk of aggressive lasers.
Best for: Texture, mild scarring, overall skin quality improvement, tone evenness Time: 45–60 minutesDowntime: 24–72 hoursCost: $200–$500 per session
Laser Resurfacing — Structural Glow for When You Can Plan Ahead
Laser resurfacing produces the most significant structural skin change available at a med spa. Non-ablative options (Fraxel, IPL) require 2–5 days of recovery and work well for pigmentation and early texture; ablative fractional CO2 requires 7–14 days and delivers dramatic wrinkle reduction and resurfacing in a single session.
For busy moms, laser resurfacing is a “plan your calendar” treatment. It delivers results that months of surface-level maintenance cannot match — but only when you can actually absorb the recovery window.
Best for: Significant pigmentation, wrinkle reduction, overall resurfacing Time: 30–60 minutesDowntime: 2–14 days depending on typeCost: $400–$3,000
Med Spa Glow Treatments at a Glance
| Treatment | Time | Downtime | Best For | Cost Per Session | Cadence |
|---|---|---|---|---|---|
| Hydrafacial | 30–45 min | None | Immediate glow, maintenance | $150–$300 | Monthly |
| Superficial peel | 30–45 min | 2–4 days | Tone, mild pigment, texture | $100–$300 | Every 4–6 weeks |
| Microneedling | 45–60 min | 24–72 hours | Texture, scarring, tone | $200–$500 | Series of 3, then 1–2x/year |
| IPL photofacial | 20–30 min | 2–5 days | Brown spots, redness | $300–$600 | Quarterly |
| Fractional CO2 laser | 45–60 min | 7–14 days | Significant resurfacing | $1,500–$3,000 | 1–2x/year |
How to Stack At-Home Habits with Med Spa Treatments
The combination of a consistent home routine and periodic in-office treatments outperforms either approach alone. The key is knowing the sequencing rules so you don’t accidentally undo what you’ve just paid for.
Can You Use Vitamin C and Retinol Together?
Yes — but use them at different times of day. Vitamin C goes in the morning for antioxidant protection and brightening; retinoids go at night for cell turnover and collagen stimulation. Layering high concentrations of both together at night increases irritation with no additional glow benefit.
The reason this split works so well: vitamin C stabilizes in daylight conditions and neutralizes free radicals while you’re active; retinoids degrade in UV light and function best during the skin’s overnight repair cycle. They are genuinely complementary when separated by time of day.
When to Restart Retinoids After Microneedling
Wait until redness and tightness have settled — typically 3 to 7 days after microneedling — before reintroducing a retinoid. Start with a lower frequency (every other night) to allow skin to acclimate after the treatment. For deeper needling sessions or blood-based adjuncts like PRP, follow your clinician’s specific restart timeline rather than the general rule.
Restarting too soon increases irritation, disrupts healing, and can compromise results. The three-to-seven-day window is the practical minimum for most standard microneedling sessions.

Glowing Skin for Darker Skin Tones: What You Need to Know
Moms with darker skin tones (Fitzpatrick IV–VI) can absolutely achieve glowing skin with med spa treatments — but treatment choice and provider experience matter significantly more than for lighter skin tones. Aggressive lasers and deep peels carry a higher risk of post-inflammatory hyperpigmentation, which can leave dark spots that are harder to treat than the original concern.
The rules that protect you:
- Choose a provider who specifically names the device and settings they use for Fitzpatrick IV–VI skin
- Insist on test spots before any laser or energy-based full-face treatment
- Microneedling and superficial peels are generally safer first-line options for darker skin tones
- Pico-second lasers and Nd:YAG devices have better safety profiles for darker skin than ablative CO2 or aggressive IPL
- Preconditioning with a tyrosinase inhibitor (azelaic acid, tranexamic acid, niacinamide) for 4–8 weeks before any procedure reduces PIH risk meaningfully
Red flag: A provider who offers you the same laser protocol as a lighter-skinned patient without discussion of your Fitzpatrick type or test spots is not the right provider for your skin.
For a full breakdown of which treatments are safest for different skin tones, see our skin treatments comparison guide.
Glowing Skin During Pregnancy and Breastfeeding
Most glowing skin procedures are safe to plan around — but pregnancy and breastfeeding require adjustments that are non-negotiable. The good news: a solid at-home routine alone can produce meaningful visible improvement during this window, and some low-risk office options are available.
| Treatment / Ingredient | Pregnancy | Breastfeeding | Notes |
|---|---|---|---|
| Mineral SPF (zinc oxide) | Safe | Safe | Daily, non-negotiable |
| Vitamin C serum | Generally safe | Generally safe | Confirm with OB |
| Hyaluronic acid | Safe | Safe | No known risk |
| Niacinamide | Generally safe | Generally safe | Good retinoid substitute |
| Retinoids (all forms) | Defer | Defer | Stop immediately if pregnant or TTC |
| Hydrafacial (base) | Discuss with provider | Check booster ingredients | Avoid retinol/acid boosters |
| Dermaplaning | Generally low-risk | Generally low-risk | Mechanical only; no actives |
| Superficial peel | Generally deferred | Discuss with provider | Some light lactic acceptable; confirm |
| Microneedling / RF | Defer | Defer | Energy-based; standard guidance is to wait |
| Laser / IPL | Defer | Defer | Hormonal pigment changes increase risk |
Safe glow stack during pregnancy: Mineral SPF 50+ daily, vitamin C serum (OB-confirmed), HA hydrator, niacinamide in place of retinoid. This combination produces real visible improvement and protects skin during a period when pigment is more reactive.
What to Ask at Your Glowing Skin Consultation
A focused consult produces a clear plan. A vague consult produces a long menu and sticker shock. These questions keep the conversation productive:
- Which specific device or peel formula will you use — brand and model?
- What visible change should I expect and over what timeline?
- What is the exact downtime in days?
- What is your test-spot protocol for my skin tone?
- What is the cost for a full series versus a single session?
- What happens if I react — what is your adverse event protocol?
- Is this treatment safe if I am pregnant or breastfeeding?
- What home care do I need to adjust before and after treatment?
Bring to your consult:
- Current medication list (topical and oral)
- Recent procedure history (last 12 months)
- Natural-light baseline photos of your skin
- Your three constraints in writing: available time, downtime tolerance, and monthly budget
If a provider dodges any of these questions or cannot name the specific device they plan to use, walk away and book elsewhere.
Key Takeaways
- Glowing skin tips for moms start with protection: daily SPF and vitamin C before any procedure, every time
- The Glow ROI rule: invest where one product or one hour produces the largest visible change; skip low-impact add-ons
- Match your treatment tier to your actual schedule — zero downtime for busy weeks, planned procedures for school breaks
- Vitamin C in the AM, retinoid at PM — the most effective and lowest-risk active pairing for glowing skin
- After microneedling: restart retinoids after 3–7 days; start every other night to ease the skin back in
- Darker skin tones: test spots, Fitzpatrick-validated device settings, and preconditioning are non-negotiable
- Pregnant or breastfeeding: mineral SPF, vitamin C, HA, and niacinamide are your safe glow stack; defer retinoids and energy-based procedures
- Durable radiance comes from protecting and maintaining results with consistent home habits, not from a single procedure
Frequently Asked Questions
What are the best glowing skin tips for moms?
The most effective glowing skin tips for busy moms are also the simplest: daily broad-spectrum SPF, a vitamin C serum in the morning, and a retinoid at night. These three habits alone produce visible brightness, texture improvement, and protection over 8–12 weeks of consistency. Layer in a monthly Hydrafacial or quarterly superficial peel and the results compound meaningfully over time.
What med spa treatments give you glowing skin?
The most reliable med spa treatments for glowing skin are Hydrafacial for immediate zero-downtime radiance, superficial chemical peels for progressive tone and texture improvement, and microneedling for collagen-driven glow that builds over a series of sessions. IPL photofacial is the strongest option for brown spots and vascular redness on lighter skin tones. The right choice depends on your primary concern and available recovery window.
How long does it take to see glowing skin results?
Surface hydration and brightness improve within days of a Hydrafacial or after a superficial peel. Meaningful improvement in tone and texture from retinoids and microneedling takes 8–12 weeks of consistent use. Structural skin changes from laser resurfacing develop over 3–6 months as collagen remodeling completes.
Can I get glowing skin without downtime?
Yes. Hydrafacial, dermaplaning, and Botox all have essentially zero downtime and produce real visible improvement. A consistent at-home routine with vitamin C and SPF also delivers progressive glowing skin results with no recovery time at all. Zero-downtime treatments produce surface-level results; structural collagen change requires accepting some planned recovery.
Is it safe to get glow treatments while pregnant?
Most energy-based procedures including IPL, laser resurfacing, and RF microneedling are deferred during pregnancy. Retinoids are also stopped immediately. A safe glowing skin routine during pregnancy includes mineral SPF daily, vitamin C (OB-confirmed), hyaluronic acid, and niacinamide as a retinoid substitute. Dermaplaning is generally considered low-risk. Always confirm any treatment with your OB before booking.
What is the best at-home routine for radiant skin?
The most effective at-home radiant skin routine uses five products in the morning: hydrating cleanser, vitamin C serum, hyaluronic acid hydrator, ceramide moisturizer, and broad-spectrum SPF. At night: gentle cleanser, retinoid, and barrier moisturizer. This stack consistently outperforms more complex routines because every step has a clear job and the active ingredient load is manageable.
How do I combine vitamin C and retinol for glowing skin?
Use vitamin C in the morning and retinoid at night — never both at the same time. Vitamin C provides daytime antioxidant defense and brightening; retinoids drive overnight cell turnover and collagen production. Separating them by time of day preserves both benefits and eliminates the irritation that comes from layering high-concentration actives together.
Are glow skin treatments safe for darker skin tones?
Yes, with the right provider and the right treatment choices. Microneedling and superficial peels are the safest first-line options for Fitzpatrick IV–VI skin. Aggressive lasers and deep peels carry higher PIH risk and should only be performed by a provider using validated device settings for your skin tone, with test spots before any full-face treatment. Preconditioning with azelaic acid or niacinamide for 4–8 weeks before procedures further reduces risk.
This post is for informational purposes only and is not a substitute for professional medical or dermatological advice. Always consult a board-certified clinician before beginning any in-office treatment, especially if you are pregnant, breastfeeding, or have a history of post-inflammatory hyperpigmentation.

O: Oh, It’s A Vegan Banana Pudding
Today’s recipe is a simple vegan banana pudding. I am not a vegan, however I am working on changing some of my dietary habits especially when it comes to desserts. This one was a challenge. Why? Because banana pudding (the traditional way) is perfection in my eyes. It’s like what Junior’s is to cheesecake. Like what Katz Deli is to a pastrami sandwich. You get my drift.
I was reluctant to think about banana pudding any other way but in its rich, yummy, fatty glory. But I exercised will power and did it anyway. Here is my Vegan Banana Pudding. Took me 2 tries but I think this version is perfect. The Hubs enjoyed it and trust me he doesn’t want to hear it when it comes to a healthier dessert. Score for me! I won’t lie though, this will not replace my beloved traditional banana pudding. I may a “Will you marry me?” it’s that good version. But for guilt free yumminess, this recipe does the trick.
Since I mentioned cheesecake, I received the sweetest inbox message from Donna (a woman I met at Ikea) saying she made my Strawberry Cheesecake Bites for a brunch over the weekend and they were a big hit. Awww, it’s nice to know you guys are trying out the recipes. Seriously, I almost cried. My eyes did get wet but who says those were tears? WHO?
Vegan Banana Pudding
Ingredients
2 cups unsweetened almond milk
¼ cup raw sugar
2 tablespoons cornstarch
2 teaspoons pure vanilla extract
2 ½ medium bananas
½ box of vegan vanilla wafers
Cinnamon for dusting
Instructions
Heat milk in a medium saucepan over low heat, stirring to avoid scald. Mash half of a banana mixing it with a little water and then add to milk. Whisk until mixture is well combined.
Mix cornstarch and sugar together in a small mixing bowl. Add 1 to 2 tablespoons of water and mix creating a paste. Whisk in to milk. Raise heat to medium-high. Stir until mixture thickens, approximately 5-7 minutes.
Transfer pudding to a bowl and set a layer of plastic wrap directly on top of the pudding. Refrigerate to set (2-4 hours)
For individual servings, put a thin layer of pudding in a dessert glass then layer with wafers and sliced bananas. Continue this process for 2-3 layers. For one large pudding, layer a small baking dish starting with wafers, then a layer of bananas and a layer of pudding. Repeat this process to form a second layer.
Dust with cinnamon.
Now here’s the pudding recipe. Enjoy.

Chemical Peels vs. Microneedling vs. Laser: The Complete Guide to Skin Treatments for Moms
Choosing the right skin treatment as a busy mom comes down to four things: your skin concern, your skin tone, your schedule, and your budget. This guide cuts through the clinic jargon so you can walk into any consult knowing exactly what to ask.
Table of Contents
TL;DR — Skip to What You Need
- Best for acne scars: Professional microneedling (SkinPen) or RF microneedling (Morpheus8), 3–6 sessions
- Best for fine lines and tightening: Fractional CO2 laser, dramatic results in 1 session — but plan 7–14 days downtime
- Best for a quick glow with zero recovery: Superficial chemical peels, every 4–12 weeks
- Best for stubborn pigment or melasma: Conservative superficial peels + topical prep first; laser only after specialist conditioning
- Darker skin tones (Fitzpatrick IV–VI): Microneedling and superficial peels are safest; aggressive ablative lasers carry higher PIH risk
- Pregnant or breastfeeding? Most procedures are deferred — always confirm with your provider
- The smartest strategy: Layer low-downtime treatments first, then graduate to one stronger resurfacing session when timing and childcare align
What Are the Main Types of Skin Treatments for Moms?
The three core categories — chemical peels, microneedling, and laser resurfacing — work by different mechanisms and sit on a predictable risk-reward axis.
Deeper treatment = bigger single-session results + more downtime + higher risk. Gentler treatment = repeat visits needed + easier to schedule + safer across skin tones.
| Treatment | Mechanism | Downtime | Avg. Cost Per Session | Sessions Needed |
|---|---|---|---|---|
| Superficial chemical peel | Acid exfoliation (glycolic, lactic) | 0–3 days | $150–$350 | 4–6 |
| Medium/deep chemical peel | TCA or phenol, deeper exfoliation | 5–10 days | $400–$800 | 1–3 |
| Microneedling (SkinPen) | Collagen induction via micro-injuries | 24–72 hrs | $200–$500 | 3–6 |
| RF Microneedling (Morpheus8) | Microneedling + radiofrequency heat | 2–5 days | $500–$800 | 2–4 |
| Non-ablative laser (Fraxel, IPL) | Light energy without removing skin | 2–5 days | $400–$900 | 2–5 |
| Ablative fractional CO2 | Removes outer skin layer | 7–14 days | $1,500–$3,000 | 1–2 |
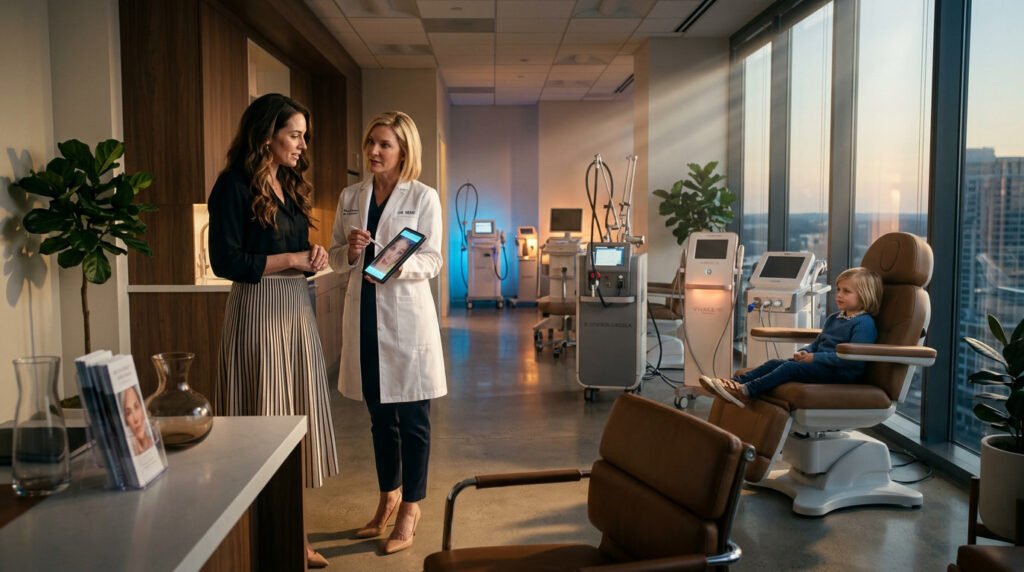
How Do Chemical Peels Work — and Are They Worth It?
Chemical peels use acids (glycolic, lactic, salicylic, TCA) to dissolve dead skin cells and stimulate fresh skin cell turnover. Superficial peels target only the top layer of skin; medium and deep peels penetrate further for more dramatic improvement.
Superficial peels are the best entry-level skin treatment for moms who want visible brightness without taking time off. They work well for mild hyperpigmentation, dull texture, clogged pores, and early fine lines. Most people see a subtle glow within 3–5 days and can continue normal activities within 24 hours.
Medium and deep peels (TCA, phenol) can address deeper wrinkles and more significant pigmentation but require 5–10+ days of noticeable peeling. They’re best planned around a gap in your mom-schedule — school vacation weeks or when backup childcare is lined up.
Which Skin Concerns Do Peels Treat Best?
- ✅ Dull, uneven skin tone
- ✅ Mild acne and clogged pores
- ✅ Early fine lines and light sun damage
- ✅ Mild post-acne marks (with the right acid formula)
- ⚠️ Melasma — peels can help, but relapse risk is high without ongoing sun protection and topical maintenance
- ❌ Deep acne scars or significant skin laxity (microneedling or laser will give better results)
How Does Microneedling Work — and Is It Right for You?
Microneedling uses tiny, controlled micro-injuries to trigger the skin’s natural collagen and elastin production. A professional device like SkinPen creates thousands of micro-channels, stimulating repair and remodeling over the following weeks.
Microneedling is one of the most versatile and skin-tone-safe treatments available, which makes it a strong first choice for moms with Fitzpatrick III–VI skin who want meaningful texture improvement without the post-inflammatory hyperpigmentation (PIH) risk of ablative lasers.
RF microneedling (Morpheus8, Vivace) adds radiofrequency heat to the micro-injury, reaching deeper tissue layers for more significant lifting, tightening, and scar remodeling — with slightly more downtime (2–5 days of redness and swelling).
What Results Can You Realistically Expect from Microneedling?
Most people need 3–6 sessions spaced 4–6 weeks apart before they see the full picture. Results continue improving for 3–6 months after the final session because collagen remodeling is a slow process.
Real-world example: A 38-year-old mom with rolling acne scars and Fitzpatrick IV skin completed three SkinPen sessions spaced six weeks apart, paired with dermatologist-prescribed azelaic acid. She returned to work within two days after each session. At the three-month mark she had measurable texture improvement — no PIH, no drama.
How Does Laser Skin Resurfacing Work?
Laser treatments use focused light energy to either remove damaged skin (ablative) or heat tissue below the surface without removing it (non-ablative). The right laser depends on your skin concern, skin tone, and how much downtime you can genuinely absorb.
Non-Ablative Lasers (Fraxel, IPL, Clear + Brilliant)
These are the lower-downtime laser options — 2–5 days of mild redness and swelling — and work well for:
- Brown spots and sun damage on lighter skin tones (Fitzpatrick I–III)
- Vascular redness
- Early texture and pore refinement
IPL (Intense Pulsed Light) is not technically a laser but is grouped here — it’s very effective for vascular redness and sunspots on lighter skin and requires minimal downtime.
Ablative Fractional CO2 Laser
This is the strongest option for anti-aging. A fractional CO2 laser can deliver significant tightening, wrinkle reduction, and resurfacing in a single session — but expect 7–14 days of meaningful downtime: redness, peeling, and social avoidance.
Cost runs $1,500–$3,000+ and should be performed by a board-certified dermatologist, not a general med spa technician. This is a “plan your calendar around it” treatment.
Are Lasers Safe for Darker Skin Tones?
This is the most important safety question in this guide. Aggressive ablative lasers carry a significantly higher risk of PIH and permanent pigmentation changes on Fitzpatrick IV–VI skin. Non-ablative options like Nd:YAG lasers and pico-second lasers can be safer for darker skin, but only when:
- A dermatologist performs test spots first
- A preconditioning protocol (tyrosinase inhibitors, sunscreen) runs 4–8 weeks before treatment
- Conservative settings are used with careful follow-up
If your provider cannot explain their protocol for your skin tone specifically, that is a red flag.
Skin Treatments and Melasma: What Actually Works?
Melasma is one of the most challenging skin concerns for moms because it is hormonally driven and prone to relapse — especially with sun exposure or hormonal fluctuation.
The honest answer: no single in-office treatment cures melasma. The most effective approach combines:
- Daily broad-spectrum SPF 50+ (mineral sunscreen is ideal)
- Topical brighteners (azelaic acid, tranexamic acid, niacinamide) used consistently
- Superficial chemical peels under dermatologist supervision for incremental improvement
- Pico-second lasers only after preconditioning — and only under specialist care
Aggressive laser treatments can paradoxically worsen melasma by causing heat-triggered pigment overproduction. Always see a dermatologist, not just a med spa, before treating melasma.
Skin Treatments During Pregnancy and Breastfeeding
The general rule: most in-office procedures are deferred during pregnancy. Many clinicians also avoid aggressive treatments while breastfeeding.
- ✅ Generally considered low-risk while breastfeeding (with provider guidance): some superficial glycolic or lactic acid peels
- ⚠️ Gray area / discuss with your provider: gentle microneedling protocols
- ❌ Typically deferred until postpartum: deep peels, lasers, PRP, RF devices
If you’re postpartum and eager to start treatment, the safest path is a topical-first protocol: mineral sunscreen daily, azelaic acid or niacinamide for pigment, and gentle retinoid once cleared by your OB. Schedule your first in-office treatment once breastfeeding is complete or after a full risk discussion with a board-certified dermatologist.
How to Compare Costs: What Should Skin Treatments Actually Cost?
Budget planning matters as much as treatment selection. Here’s a realistic cost framework:
| Goal | Best Treatment Option | Sessions | Approx. Total Cost |
|---|---|---|---|
| Maintenance glow | Superficial peels | 4–6/year | $600–$2,100/yr |
| Texture + mild scarring | Microneedling series | 3–6 | $600–$3,000 |
| Significant scarring | RF Microneedling | 2–4 | $1,000–$3,200 |
| Wrinkle reduction (dramatic) | Fractional CO2 | 1–2 | $1,500–$6,000 |
| Sunspots / vascular (lighter skin) | IPL series | 3–5 | $900–$4,500 |
Practical tip: Many med spas offer package pricing (buy 3, get 1 free). Always ask. Also ask whether your maintenance topicals are included in the package price or an add-on.
If you’re just starting to explore your options, browse our full med spa treatments guide for more breakdowns, reviews, and mom-tested advice.
Provider Checklist: Questions to Ask Before You Book
Don’t skip this step. The provider and their experience with your skin type matter more than the machine brand.
Must-ask questions at your consult:
- What specific device or peel formula will you use? (Brand and model)
- Can I see before-and-after photos of patients with my skin tone?
- What is the exact downtime I should plan for?
- What is your protocol for managing PIH for my skin tone?
- Who will be in the room performing the treatment — you, or a technician?
- What is your aftercare protocol and what products will I need?
- What happens if I have a reaction or complication?
Red flags to walk away from:
- Provider cannot name the specific device or formula
- No before/after photos matching your skin tone
- One-size-fits-all treatment plan with no skin tone discussion
- Pressure to book on the spot
- No written recovery timeline provided
The Smartest Strategy for Busy Moms: A Layered Approach
The most effective — and most mom-friendly — approach is not a single dramatic treatment. It’s a layered plan that matches each phase of your life.
Phase 1 — Foundation (Month 1–3): Daily mineral SPF 50+, vitamin C serum, and a topical brightener or retinoid (if postpartum and cleared). This preconditioning phase protects results and reduces PIH risk before any in-office procedure.
Phase 2 — Low-Downtime In-Office (Month 2–6): Start a series of superficial peels or microneedling sessions. These improve texture and tone with 24–72-hour recovery windows you can plan around school pickup.
Phase 3 — Targeted Upgrade (When Timing Aligns): Once you’ve seen what lower-level treatments can do and have childcare for a 7–14 day window, consider a single stronger resurfacing session (RF microneedling, Fraxel, or fractional CO2) for a significant visible jump.
This approach reduces wasted spend, minimizes risk, and gives you visible milestones along the way instead of one all-or-nothing gamble.

Key Takeaways
- Skin treatments for moms work best as a layered plan — not a single heroic procedure.
- Microneedling is the most versatile and skin-tone-safe option for texture and scarring.
- Superficial chemical peels are the easiest entry point for tone and glow with minimal disruption.
- Fractional CO2 laser delivers the most dramatic single-session anti-aging result — but only when you can absorb 7–14 days of downtime.
- Darker skin tones require a dermatologist, preconditioning, and conservative settings — not a standard med spa menu.
- Melasma needs a long-term management plan, not an aggressive laser session.
- Pregnancy and breastfeeding = defer most procedures; topicals first, always.
- Ask the right questions at your consult. A great provider welcomes them; a red-flag provider deflects.
For official guidance on procedure safety and device approvals, the FDA’s resource on aesthetic cosmetic devices is a reliable starting point before booking any in-office skin treatment.
Frequently Asked Questions
What are the best skin treatments for busy moms?
The best skin treatments for busy moms balance visible results with manageable downtime. Superficial chemical peels and microneedling are the most practical starting points — both deliver real improvement with 24–72 hours of recovery, easy to schedule around school and work. For a more significant result, fractional CO2 laser can be planned for a window when childcare is available.
How many microneedling sessions do I need to see results?
Most people need 3–6 microneedling sessions spaced 4–6 weeks apart to see the full benefit. You may notice smoother texture after session 1–2, but peak collagen remodeling results develop 3–6 months after completing the series.
Are chemical peels or microneedling better for acne scars?
Both can improve acne scars, but microneedling (especially RF microneedling like Morpheus8) typically gives more significant improvement for rolling and boxcar scars because it remodels deeper tissue. Chemical peels are better suited for surface texture, discoloration, and mild post-acne marks.
Is laser resurfacing safe for darker skin tones?
Aggressive ablative lasers carry higher PIH risk for Fitzpatrick IV–VI skin and should only be used under a board-certified dermatologist with experience in darker skin tones, using test spots and a preconditioning protocol. Microneedling and superficial peels are generally safer first-line options for darker skin
Can I get skin treatments while breastfeeding?
Most in-office procedures — especially lasers, deep peels, and PRP — are deferred until after breastfeeding. Some providers offer superficial glycolic or lactic acid peels during breastfeeding after a risk discussion. Always consult a board-certified dermatologist before booking any treatment while breastfeeding.
How much do skin treatments cost?
Costs vary widely by treatment type and provider. Superficial peels run $150–$350 per session; microneedling runs $200–$500 per session; fractional CO2 laser runs $1,500–$3,000+ per session. A realistic annual treatment budget for ongoing maintenance is $1,500–$4,000 depending on your goals.
What is the downtime for microneedling vs. laser?
Microneedling typically requires 24–72 hours of redness and mild swelling. Non-ablative lasers (Fraxel, IPL) require 2–5 days. Ablative fractional CO2 requires 7–14 days of significant social downtime. Choose based on your realistic schedule, not the treatment’s marketing claims.
What should I ask at my skin treatment consultation?
Ask the provider to name the specific device or peel formula, show you before-and-after photos of patients with your skin tone, explain the exact downtime in days, describe their PIH management protocol for your skin tone, and confirm who will perform the treatment. If they hesitate on any of these, consider it a red flag.
This post is for informational purposes only and is not a substitute for medical advice. Always consult a board-certified dermatologist before beginning any in-office skin treatment, especially if you have darker skin, are pregnant, are breastfeeding, or take prescription medications.
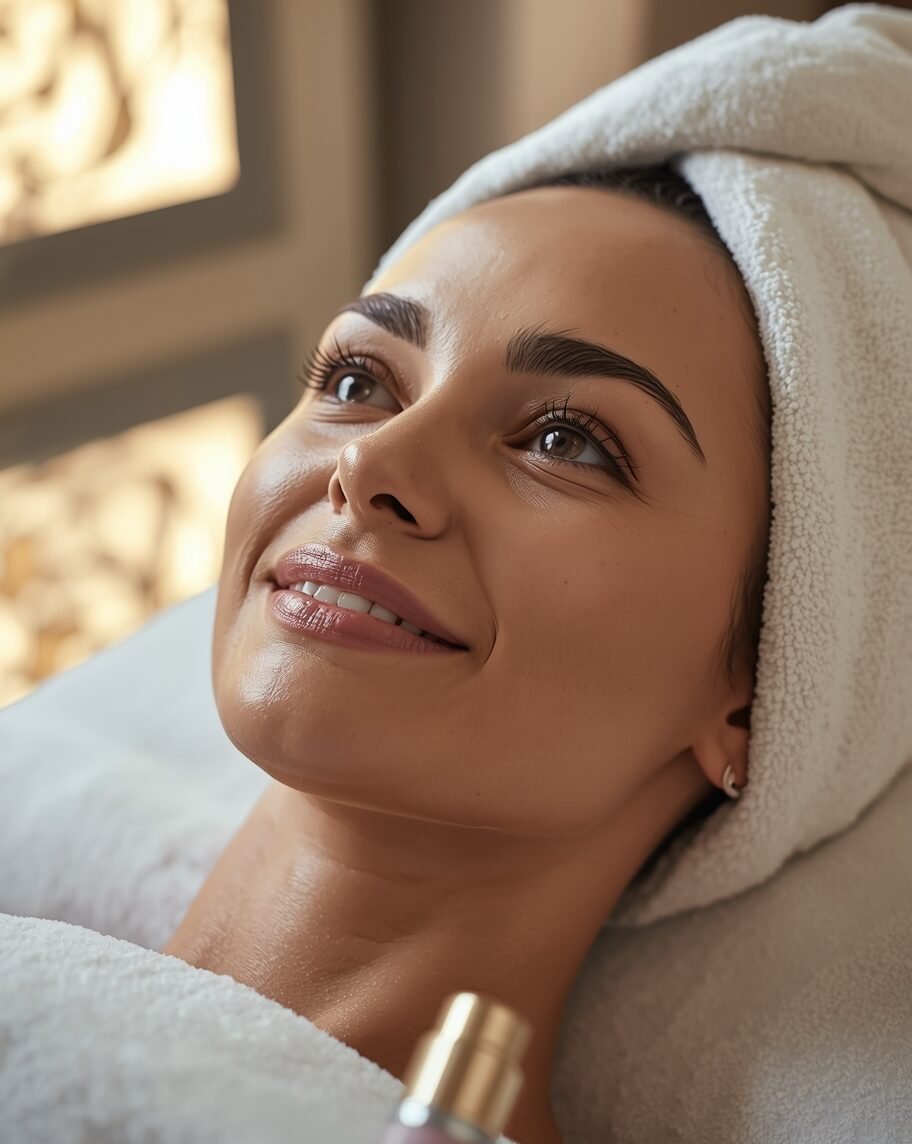
Med Spa Facial Treatments for Busy Moms: What Actually Works (and What’s Worth Skipping)

Med spa facial treatments can deliver real anti-aging results — but only if you match the right procedure to your actual goal, schedule, and budget. This guide breaks down every major option so you can book with confidence and skip the upsell.
TL;DR
- Zero downtime, quick glow: Hydrafacial (30–45 min), dermaplaning (20–30 min), LED therapy (add-on)
- Real anti-aging results: RF microneedling, Botox, fractional lasers — these are the collagen-stimulating tier
- Smartest strategy for moms: Use express treatments for maintenance and event prep; schedule one deeper session per quarter when childcare aligns
- Express treatments won’t fix deep lines or laxity — they’re maintenance tools, not structural solutions
- Pregnant or breastfeeding? Most med spa procedures are deferred — always disclose before booking
- Ask every provider: what device or formula, exact downtime, and before/afters of patients like you
Table of Contents
What Are Med Spa Facial Treatments — and How Do You Choose?
Med spa facial treatments range from zero-downtime express options like Hydrafacial to collagen-stimulating procedures like RF microneedling and fractional lasers. The right choice depends on your primary skin concern, how much recovery time you can absorb, and your budget per session. Busy moms get the best return from matching the treatment tier to their goal — not chasing the trendiest name on the menu.
There are two distinct tiers worth understanding before you book anything:
- Express treatments (Hydrafacial, dermaplaning, LED, microdermabrasion): immediate polish and pore-clearing, zero to minimal downtime, best for maintenance and event prep
- Collagen-stimulating treatments (RF microneedling, Botox, fractional lasers): create structural anti-aging change, require some downtime and multiple sessions, deliver results that last months to years
The mistake most moms make is expecting express treatment results from a collagen-stimulating problem — or booking an aggressive procedure without planning for the recovery window. This guide helps you avoid both.
Express Treatments: Best Med Spa Facial Options for Zero Downtime
Express med spa facial treatments are the scheduling-friendly tier. Most appointments run under 45 minutes, require no recovery time, and can be slotted between school pickup and a work call. The trade-off: they deliver surface-level improvement, not structural anti-aging change.
Hydrafacial — Is It Worth It?
Hydrafacial is worth it for what it is — one of the most consistent, predictable express treatments available. In 30–45 minutes it delivers gentle chemical exfoliation, vortex extraction for congested pores, and infusion of targeted serums (brightening, antioxidant, peptide boosters). There is essentially zero downtime: most people leave with cleaner pores, temporarily reduced shine, and a noticeably brighter complexion that lasts several days to a couple of weeks.
What Hydrafacial is not: a replacement for collagen-stimulating procedures. It won’t meaningfully reduce deep wrinkles, improve significant skin laxity, or resolve long-standing hyperpigmentation on its own. Use it as your maintenance layer and event-prep tool — not your primary anti-aging strategy.
Best for: Pre-event skin prep, maintenance between deeper treatments, clogged pores, dull texture, mild congestion Avoid if: You’re expecting structural wrinkle or laxity improvement
Real-world example: A 38-year-old mom booked a Hydrafacial the morning of her daughter’s recital. The result was reduced shine, fewer visible blackheads, and smoother makeup application. She had completed a microneedling session four weeks prior to address texture — the Hydrafacial kept skin calm and made makeup sit better on treated areas.
Dermaplaning
Dermaplaning uses a sterile blade to remove the top layer of dead skin cells and vellus hair (“peach fuzz”) in 20–30 minutes. The immediate result is noticeably smoother skin texture and significantly better product and makeup penetration. It is painless, requires no downtime, and can be done as a standalone or paired with a peel or Hydrafacial.
Important contraindication: Avoid dermaplaning if you have active cystic acne — the blade can spread bacteria and worsen breakouts.
LED Light Therapy
LED therapy uses specific wavelengths of light to reduce inflammation (red LED) or target acne bacteria (blue LED). At 10–20 minutes per session, it’s best positioned as an add-on after extractions or as a recovery accelerator post-microneedling — not a solo anti-aging treatment. Benefit per dollar is modest as a standalone; as a complement to other procedures it earns its place.
Microdermabrasion
Microdermabrasion uses a diamond-tipped wand or fine crystals to physically resurface the top layer of skin. It addresses dullness, mild texture issues, and minor sun damage with minimal downtime and no needles or heat. It’s a reasonable entry point for moms new to med spa treatments who want visible improvement with very low risk.
Oxygen Facials — Worth the Upcharge?
Oxygen and hydration spray facials deliver a temporary, cosmetic glow — the improvement fades within days and the mechanism does not stimulate lasting skin change. Some clinics charge significantly more for oxygen facials than the results justify. They’re not harmful, but they’re the category most likely to be over-hyped and over-priced relative to benefit.
Verdict: Skip the oxygen facial upcharge unless you specifically enjoy the experience. Put that budget toward a microneedling session instead.
Express Treatments at a Glance
| Treatment | Appointment Time | Downtime | Best For | Approx. Cost |
|---|---|---|---|---|
| Hydrafacial | 30–45 min | None | Glow, pore cleansing, event prep | $150–$300 |
| Dermaplaning | 20–30 min | None | Smooth texture, better product penetration | $75–$150 |
| LED therapy | 10–20 min (add-on) | None | Inflammation reduction, recovery support | $50–$100 |
| Microdermabrasion | 30–45 min | Minimal | Dullness, mild texture | $100–$200 |
| Oxygen facial | 30–45 min | None | Temporary glow (cosmetic only) | $100–$250 |
Collagen-Stimulating Treatments: When You Want Real Anti-Aging Results
Collagen-stimulating med spa facial treatments are where structural anti-aging change happens. These procedures create controlled injury or targeted energy delivery to trigger the skin’s repair response — producing new collagen and elastin over weeks and months. They require more planning, more budget, and real recovery time, but they deliver results that last.
RF Microneedling (Morpheus8, Vivace)
RF microneedling adds radiofrequency heat to the micro-injury, reaching deeper tissue layers for more significant lifting, tightening, and scar remodeling — with slightly more downtime (2–5 days of redness and swelling). Not all RF microneedling devices work the same way, though. Devices like Morpheus8 use continuous energy delivery, while newer platforms like Sylfirm X use a dual-wave mode that also targets the abnormal vasculature behind melasma and rosacea — making device selection an important part of your consult conversation. If you want a deep dive on how the technology differs, this breakdown of Sylfirm X RF microneedling vs. other devices from Catara Med Spa is worth a read before you book.
Most treatment plans call for 2–4 sessions spaced 4–6 weeks apart. Results continue improving for 3–6 months after the final session as collagen remodeling completes. It’s particularly effective for acne scarring, enlarged pores, early jowling, and overall skin tightening.
Best for: Texture, scarring, mild to moderate laxity, skin tightening Downtime: 2–5 days redness and swelling Cost: $500–$800 per session
Botox and Neuromodulators
Botox (and similar neuromodulators: Dysport, Xeomin, Daxxify) relaxes the muscle contractions that cause dynamic wrinkles — forehead lines, crow’s feet, frown lines between the brows. An appointment takes 10–15 minutes with no downtime. Results appear within 3–7 days and typically last 3–4 months.
Botox does not treat skin texture, pigmentation, or laxity — it addresses expression-based wrinkles specifically. It’s one of the highest-convenience, most schedule-friendly options in the collagen-stimulating tier: lunch-break appointment, no recovery, consistent results.
Best for: Dynamic wrinkles (forehead, crow’s feet, glabellar lines) Downtime: None (avoid lying down or heavy exercise for 4 hours post-injection) Cost: $10–$15 per unit; typical full treatment $200–$600 depending on areas
Fractional Lasers (Fraxel, CO2)
Fractional laser resurfacing delivers the most dramatic single-session anti-aging results of any med spa procedure — and the most significant downtime. Non-ablative options (Fraxel Restore) require 2–5 days of redness; ablative fractional CO2 requires 7–14 days of meaningful recovery.
For busy moms, fractional lasers are a “plan your calendar” treatment: book around a gap in childcare obligations, a school break, or a stretch with no social commitments. The trade-off is worth it for moms targeting significant wrinkle reduction, sun damage, or overall resurfacing — one well-timed session can deliver results that lower-tier treatments require years to approach.
Best for: Significant wrinkle reduction, sun damage, overall resurfacing (lighter skin tones; darker tones require specialist oversight) Downtime: 2–14 days depending on intensity Cost: $400–$3,000 depending on type and provider
Collagen-Stimulating Treatments at a Glance
| Treatment | Appointment Time | Downtime | Sessions Needed | Approx. Cost Per Session |
|---|---|---|---|---|
| Botox | 10–15 min | None | Every 3–4 months | $200–$600 |
| RF Microneedling | 45–90 min | 2–5 days | 2–4 | $500–$800 |
| Fraxel (non-ablative) | 30–45 min | 2–5 days | 2–5 | $400–$900 |
| Fractional CO2 | 45–60 min | 7–14 days | 1–2 | $1,500–$3,000 |
How to Build a Realistic Treatment Plan Around a Busy Schedule
The most effective approach for busy moms isn’t a single dramatic treatment — it’s a layered plan that fits around real life and builds visible improvement over time.
The Three-Phase Layered Plan
Phase 1 — Foundation (Month 1–2): Daily SPF 50+ mineral sunscreen, a vitamin C serum, and a retinoid or brightener (if cleared by your provider). This preconditioning step protects results and reduces complication risk before any in-office procedure.
Phase 2 — Express Maintenance (Ongoing): Schedule a Hydrafacial or dermaplaning session every 4–8 weeks. These appointments fit in under an hour, keep skin in its best baseline condition, and make your deeper treatments perform better.
Phase 3 — Targeted Collagen Sessions (Quarterly or As Planned): Book one RF microneedling or Botox session when your schedule allows 2–5 days of recovery or a 15-minute lunch break. Plan a fractional laser session once a year during a school break or holiday window if laxity or resurfacing is a priority goal.
Sample Plans by Time Availability
| Time Available | Best Starting Treatment | Maintenance Cadence |
|---|---|---|
| 30–45 min, zero recovery | Hydrafacial | Every 4–8 weeks |
| 30–45 min, zero recovery | Botox | Every 3–4 months |
| 2–5 days recovery (plan ahead) | RF Microneedling series | 2–4 sessions, 4–6 weeks apart |
| 7–14 days recovery (school break) | Fractional CO2 | Once annually |
Are Med Spa Facial Treatments Safe During Pregnancy or Breastfeeding?
Most collagen-stimulating med spa treatments — including RF microneedling, lasers, and deep peels — are deferred during pregnancy and breastfeeding. Some superficial express treatments may be available after a provider risk discussion. Always disclose your pregnancy or breastfeeding status before booking any med spa appointment.
Here’s a quick safety reference:
| Treatment | Pregnancy | Breastfeeding |
|---|---|---|
| Hydrafacial | Generally deferred (serum ingredients vary) | Discuss with provider |
| Dermaplaning | Generally considered low-risk | Generally considered low-risk |
| LED therapy | Generally low-risk | Generally low-risk |
| Botox | Deferred | Deferred |
| RF Microneedling | Deferred | Deferred |
| Fractional Laser | Deferred | Deferred |
The safest postpartum path: Start with a topical-first plan (mineral SPF 50+, azelaic acid, gentle retinoid once OB-cleared). Add express treatments after 6–8 weeks postpartum with provider clearance. Reserve collagen-stimulating procedures until after breastfeeding or after a full dermatologist risk discussion.
How Much Do Med Spa Facial Treatments Cost?
Budget planning is part of picking the right treatment. Here’s a realistic framework:
| Goal | Best Option | Approx. Annual Cost |
|---|---|---|
| Maintenance glow | Hydrafacial (monthly) | $1,800–$3,600/yr |
| Pore + texture upkeep | Dermaplaning (6-weekly) | $600–$1,200/yr |
| Wrinkle relaxation | Botox (3x/yr) | $600–$1,800/yr |
| Texture + mild scarring | RF Microneedling series (3 sessions) | $1,500–$2,400 |
| Significant resurfacing | Fractional CO2 (annually) | $1,500–$3,000 |
Practical tips on cost:
- Ask whether serum boosters (Hydrafacial) and topicals are included in the quoted price or add-ons
- Many med spas offer package pricing — buying a series of 3 typically saves 15–20%
- Botox is quoted per unit — always ask the total estimated unit count before you agree
What to Ask at Your Med Spa Consultation
A good provider welcomes questions. A red-flag provider deflects them.
Must-ask questions:
- What specific device, formula, or product will you use? (Get the brand and model)
- What is my exact expected downtime in days?
- Can I see before-and-after photos of patients with my skin tone and concern?
- Are serums, boosters, or topicals included in the quoted price?
- Who performs the treatment — you, or a technician?
- What is your aftercare protocol?
- What happens if I have a reaction?
Red flags to walk away from:
- Cannot name the specific device or peel formula
- No before/after photos matching your skin tone
- Pressure to book on the spot or “today only” pricing
- One-size-fits-all plan with no personalization for your concerns
- No written recovery or aftercare guidance
For more procedure-level comparisons, browse our full med spa treatments resource.
Key Takeaways
- Med spa facial treatments split into two tiers: express (zero downtime, surface results) and collagen-stimulating (real anti-aging change, requires recovery planning)
- Hydrafacial and dermaplaning are the best scheduling-friendly options for immediate glow and maintenance
- RF microneedling and Botox are the highest-value collagen-stimulating options for busy moms — manageable downtime, proven results
- Fractional lasers deliver the most dramatic results but need a planned recovery window
- The smartest strategy: Layer express treatments for upkeep + one deeper session per quarter when timing allows
- Pregnant or breastfeeding: Defer most procedures; topicals and dermaplaning first
- Ask the right questions at your consult — a good provider will have clear answers for every one
Frequently Asked Questions
What are the best med spa facial treatments for busy moms? The best med spa facial treatments for busy moms depend on the time available and the goal. For zero downtime, Hydrafacial and dermaplaning are the top picks. For real anti-aging results, RF microneedling and Botox offer the best return on time and money. The smartest approach layers both: express treatments for ongoing maintenance, deeper collagen-stimulating sessions planned around the schedule.
Is Hydrafacial worth the money? Hydrafacial is worth it as a maintenance and event-prep treatment — it delivers consistent, predictable glow with zero downtime in under 45 minutes. It is not worth it as a sole anti-aging strategy. If deep lines, laxity, or scarring are the primary concern, Hydrafacial belongs in the maintenance tier alongside a collagen-stimulating treatment plan.
What med spa facial treatments have no downtime? Zero-downtime med spa facial treatments include Hydrafacial, dermaplaning, LED light therapy, microdermabrasion, and Botox injections. These fit into a busy schedule without requiring recovery days. For collagen-stimulating change, RF microneedling requires 2–5 days and fractional lasers require 7–14 days — both need advance planning.
How often should busy moms get facial treatments? For express maintenance treatments like Hydrafacial or dermaplaning, every 4–8 weeks is the typical cadence. Botox every 3–4 months. RF microneedling as a series of 2–4 sessions, then maintenance once or twice a year. Fractional laser annually. The right cadence depends on the treatment and your specific goals.
Are med spa facials safe while breastfeeding? Most collagen-stimulating med spa procedures — including RF microneedling, lasers, and Botox — are deferred while breastfeeding. Low-risk options like dermaplaning and LED therapy are generally considered safe. Always disclose breastfeeding status before booking and confirm with a board-certified dermatologist for anything beyond basic express treatments.
What is the difference between Hydrafacial and microneedling? Hydrafacial is an express surface treatment — it exfoliates, extracts, and hydrates with zero downtime and surface-level results. Microneedling creates controlled micro-injuries to stimulate collagen production, targeting deeper texture, scarring, and laxity over a series of sessions with 24–72 hours of downtime. They serve different roles and work well together as part of a layered plan.
How much do med spa facial treatments cost? Express treatments like Hydrafacial run $150–$300 per session; dermaplaning $75–$150. Botox runs $200–$600 per treatment area. RF microneedling runs $500–$800 per session. Fractional CO2 laser runs $1,500–$3,000. Annual maintenance budgets range from $600–$4,000 depending on treatment tier and cadence.
What should I ask at a med spa consultation? Ask for the specific device or formula being used, exact downtime in days, before-and-after photos of patients with your skin tone, whether serums or boosters are included in the price, and who performs the treatment. If the provider cannot answer these clearly, consider that a red flag and seek a second consult.
This post is for informational purposes only and is not a substitute for professional medical advice. Always consult a board-certified dermatologist before beginning any in-office skin treatment, especially if you are pregnant, breastfeeding, or have a complex skin history.

A 15-Minute Skin Care Routine for Busy Moms: Anti-Aging Steps That Actually Work
Skin care routine for busy moms? You don’t need a 12-step ritual to get real anti-aging results. This guide gives busy moms a practical, sequenced skin care routine that fits between school drop-off and the first meeting — with specific product picks at every budget and clear guidance on what to skip.
TL;DR
- AM core stack (15 min): Gentle cleanser → vitamin C serum → hyaluronic acid → ceramide/peptide moisturizer → broad-spectrum SPF 30–50
- PM core stack (10 min): Gentle cleanser → retinoid → barrier moisturizer
- Biggest ROI: Daily SPF + vitamin C in the AM; retinoid at night. Everything else is optional.
- Results timeline: Hydration and texture improve in 2–4 weeks; fine lines and tone take 8–12 weeks of consistency
- Vitamin C in the AM, retinoid at PM — never both at night
- Pregnancy/breastfeeding: Stop retinoids; swap to mineral SPF + HA + vitamin C (after OB sign-off)
- Med spa add-ons (Botox, microneedling) layer on top of — not instead of — a solid home routine
Table of Contents
What Should a Skin Care Routine For Busy Moms Actually Include?
A skin care routine for busy moms needs three things in the morning — an antioxidant serum, a hydrator, and broad-spectrum SPF — and one thing at night: a retinoid. Everything else is optional. This targeted stack takes under 15 minutes twice daily and delivers more visible anti-aging benefit than a complicated multi-serum approach.
The mistake most moms make is adding more products when results feel slow. More layers usually means more irritation, more product spoilage, and more morning stress — not faster results. The research is clear: a simple, consistent routine with proven actives outperforms a complex, inconsistent one every time.
Think of your routine as two jobs: protect in the morning (antioxidants + SPF), repair at night (retinoid + barrier support). Everything else serves one of those two jobs or it doesn’t belong on your shelf.
The 15-Minute Morning Skin Care Routine For Busy Moms
Apply products in this exact order — thinnest to thickest — for maximum absorption and minimal pilling.
Step 1 — Gentle Cleanser (2 minutes)
Use a non-stripping, hydrating cleanser. Foaming cleansers and scrubs strip the skin’s natural barrier in the morning when you haven’t accumulated significant overnight buildup. A gentle wash removes overnight sweat and product residue without setting your skin up for tightness and irritation before SPF even goes on.
Product picks:
- Budget: CeraVe Hydrating Cleanser
- Mid-range: La Roche-Posay Toleriane Hydrating Gentle Cleanser
- Pat dry with a soft towel — no rubbing
Step 2 — Vitamin C Serum (3 minutes)
Vitamin C is the single most evidence-backed brightening antioxidant in a skin care routine for busy moms. Applied in the morning, it neutralizes free radicals from UV exposure, supports collagen production, and progressively evens skin tone over weeks of consistent use. This is the step where budget versus investment matters most.
Watch for oxidation: A vitamin C serum that has turned orange-brown or smells off has oxidized and lost its efficacy. Store in a cool, dark spot — or refrigerate if you use it slowly.
Product picks:a skin care routine for busy moms
- Clinical strength: SkinCeuticals C E Ferulic (15% vitamin C + vitamin E + ferulic acid — the gold standard, worth the investment if budget allows)
- Budget-stable alternative: The Ordinary Ascorbyl Glucoside Solution 12% (a stable vitamin C derivative that resists oxidation — great for travel or forgetful mornings)
- Mid-range: Paula’s Choice C15 Super Booster
Real-world example: One working mom swaps SkinCeuticals for The Ordinary when mornings are rushed. She applies The Ordinary, follows with Vichy Mineral 89, and tops with EltaMD UV Clear before school drop-off. The routine takes under 15 minutes and eliminated the morning irritation she was getting from a previous multi-serum stack.
Step 3 — Hyaluronic Acid Hydrator (3 minutes)
Hyaluronic acid draws moisture into the skin and improves how your moisturizer sits on the surface. Apply to slightly damp skin for maximum uptake — the HA pulls ambient moisture into the skin barrier rather than drawing from it.
Product picks:
- Budget: Neutrogena Hydro Boost Water Gel or serum
- Mid-range: Vichy Mineral 89 Hyaluronic Acid Booster
- Apply while skin is still slightly damp from cleansing
Step 4 — Moisturizer with Ceramides or Peptides (4 minutes)
Your moisturizer in the AM does two things: seals the hydration from your HA layer and delivers functional anti-aging ingredients (ceramides for barrier repair, peptides for collagen support). Skip heavily fragranced creams — fragrance is the most common cause of contact dermatitis in skincare.
Product picks:
- Budget: CeraVe AM Facial Moisturizing Lotion (ceramides + SPF 30 — doubles as your SPF if you’re running very short on time)
- Mid-range: Olay Regenerist Micro-Sculpting Cream (peptide-rich, consistently well-reviewed)
- Clinical: SkinMedica TNS Advanced+ Serum (if budget allows)
Step 5 — Broad-Spectrum Sunscreen (3 minutes)
This is the non-negotiable. Daily broad-spectrum SPF is the single highest-return anti-aging investment you can make — more than any serum, device, or procedure. UV exposure drives the majority of visible skin aging: fine lines, uneven tone, loss of firmness.
Use a nickel-sized amount for the face and neck. Press it in gently rather than rubbing, and allow two minutes before applying makeup. Reapply every two hours if you’re spending time outdoors.
The American Academy of Dermatology recommends applying sunscreen as the final step in your morning routine — and reapplying every two hours if you’re spending time outdoors.
Product picks:
- Budget: CeraVe Hydrating Mineral Sunscreen SPF 30 (gentle, non-whitening)
- Mid-range: La Roche-Posay Anthelios Melt-in Milk SPF 60
- Clinical/sensitive skin: EltaMD UV Clear SPF 46 (niacinamide-infused, ideal if you’re also dealing with redness or acne)
Morning Routine at a Glance
| Step | Product Category | Budget Option | Mid-Range | Clinical/Investment |
|---|---|---|---|---|
| Cleanser | Hydrating, non-stripping | CeraVe Hydrating | La Roche-Posay Toleriane | — |
| Vitamin C serum | Antioxidant | The Ordinary AG 12% | Paula’s Choice C15 | SkinCeuticals C E Ferulic |
| HA hydrator | Humectant | Neutrogena Hydro Boost | Vichy Mineral 89 | — |
| Moisturizer | Ceramide/peptide | CeraVe AM (SPF 30) | Olay Regenerist | SkinMedica TNS |
| Sunscreen | Broad-spectrum SPF 30–50 | CeraVe Mineral SPF 30 | La Roche-Posay SPF 60 | EltaMD UV Clear SPF 46 |
The 10-Minute Evening Skin Care Routine For Busy Moms
The PM routine has one primary job: repair. A retinoid is the most evidence-backed at-home anti-aging ingredient available — it accelerates cell turnover, stimulates collagen production, and progressively reduces fine lines, uneven tone, and texture with consistent use. Everything else at night exists to support the skin barrier while the retinoid does its work.
Step 1 — Cleanser (2 minutes)
Same gentle cleanser as the morning, or a slightly more thorough cleanse if you wore makeup. A double-cleanse (micellar water or cleansing balm first, then your regular cleanser) ensures SPF and makeup are fully removed before actives are applied. Retinoids applied over SPF residue are less effective and more irritating.
Step 2 — Retinoid (3 minutes)
Retinoids are the most clinically validated at-home anti-aging ingredient class available without a procedure. They increase cell turnover, stimulate collagen synthesis, and reduce the appearance of fine lines and hyperpigmentation over time. Start low and slow — irritation is the main reason moms abandon this step.
Introduction rule: Start every other night (or every third night for sensitive skin) for the first two to four weeks. Gradually increase to nightly as your skin adjusts. If dryness, redness, or flaking appears, scale back frequency and rebuild.
Product picks by strength:
- OTC/entry: Differin Adapalene Gel 0.1% (the only prescription-strength retinoid available OTC in the US — strong enough to be effective, gentle enough for beginners)
- OTC/mid: RoC Retinol Correxion Line Smoothing Serum (retinol, slightly gentler than adapalene)
- Prescription: Tretinoin 0.025%–0.05% (most evidence-backed option; requires a dermatologist or telehealth prescription — worth pursuing if OTC options aren’t delivering results after 12 weeks)
Timing tip: Apply retinoid to clean, fully dry skin. Damp skin increases absorption and irritation simultaneously — not what a beginner needs.
Step 3 — Barrier Moisturizer (2 minutes)
A ceramide-rich moisturizer immediately after your retinoid buffers irritation and supports barrier repair overnight. Don’t skip this step, especially in the first 4–8 weeks of retinoid use. Your skin’s barrier takes time to acclimate.
Product picks:
- CeraVe Moisturizing Cream (ceramide-rich, fragrance-free, ideal retinoid buffer)
- Vanicream Moisturizing Cream (great for sensitive or reactive skin)
- La Roche-Posay Cicaplast Baume B5 (richer option for dryer skin types)
Retinoid Options at a Glance
| Option | Strength | Rx Required | Best For |
|---|---|---|---|
| Differin Adapalene 0.1% | Strong OTC | No | Beginners, acne-prone |
| RoC Retinol Correxion | Moderate OTC | No | Sensitive skin, entry-level |
| Tretinoin 0.025% | Prescription | Yes | Non-pregnant adults wanting fastest results |
| Tretinoin 0.05%–0.1% | Rx, stronger | Yes | Experienced users, dermatologist-managed |
In What Order Should You Apply Skin Care Products?
Apply skin care products from thinnest to thickest consistency: cleanser → water-based serum (vitamin C or HA) → moisturizer → SPF in the AM. At night: cleanser → retinoid → barrier moisturizer. Waiting 30–60 seconds between layers helps each product absorb without pilling or balling up.
The logic is simple: heavier products create a film that prevents thinner products from penetrating. Apply in the wrong order and you’re paying for actives that never reach the skin cells they’re meant to treat.
Can You Use Vitamin C and Retinol in the Same Routine?
Yes — but not at the same time. Use vitamin C in the morning for antioxidant defense and retinoids at night for cell turnover and collagen stimulation. Applying both at night increases irritation risk significantly with no additional anti-aging benefit over separating them by time of day.
The reason this pairing works so well when split: vitamin C stabilizes in daylight conditions and neutralizes UV-triggered free radicals while you’re active; retinoids degrade in UV light and work best during the skin’s overnight repair cycle. They complement each other perfectly — just on opposite schedules.
Practical rule: AM = protect (vitamin C + SPF). PM = repair (retinoid + barrier moisturizer). Memorize those two jobs and you won’t get confused by conflicting advice.
How Quickly Will You See Results from This Routine?
Expect improvements in hydration and surface texture within 2–4 weeks. Meaningful reduction in fine lines, improved skin tone, and collagen-driven changes typically require 8–12 weeks of consistent retinoid use alongside daily SPF. Med spa procedures can shorten this window but add cost and downtime.
The honest timeline most skincare brands won’t tell you: collagen remodeling is slow. You won’t see the full benefit of a retinoid routine for three to six months. What you will notice in the first few weeks is better hydration, smoother texture, and — if you’re using vitamin C consistently — a brighter, more even tone. Those early wins are real and worth acknowledging even before the collagen work shows up.
Track your progress: Take a photo in the same light on day one and every four weeks. Skin changes happen gradually enough that your eyes miss them day-to-day — photos catch what mirrors don’t.
Is This Routine Safe During Pregnancy or Breastfeeding?
Most of this routine is safe during pregnancy and breastfeeding — with one critical exception: stop all topical retinoids (including OTC retinol and adapalene) as soon as you’re trying to conceive or learn you’re pregnant. Always confirm with your OB before reintroducing any active ingredient postpartum.
| Ingredient | Pregnancy | Breastfeeding | Notes |
|---|---|---|---|
| Hyaluronic acid | ✅ Safe | ✅ Safe | No known risk |
| Mineral SPF (zinc oxide) | ✅ Safe | ✅ Safe | Preferred over chemical SPF |
| Vitamin C (topical) | ✅ Generally safe | ✅ Generally safe | Confirm with OB |
| Chemical SPF | ⚠️ Discuss with OB | ⚠️ Discuss with OB | Some prefer to avoid oxybenzone |
| Retinoids (all forms) | ❌ Defer | ❌ Defer | Systemic absorption risk; stop immediately |
| Prescription tretinoin | ❌ Defer | ❌ Defer | Consult OB and prescribing provider |
Safe swap during pregnancy: Replace your retinoid with a niacinamide serum (brightening, pore-refining, well-tolerated) or an azelaic acid product if your provider approves. Both offer meaningful skin benefit without retinoid risk.
When Should You Add Med Spa Treatments to Your Routine?
Med spa treatments work best as accelerators layered on top of a solid home routine — not as substitutes for one. A Botox appointment won’t undo daily sun damage; a microneedling series delivers much better results on skin that’s already well-hydrated and protected.
The sequencing that works for most moms:
- Establish your home routine first (this one) for 4–8 weeks
- Add express treatments (Hydrafacial, dermaplaning) for maintenance and event prep — these pair naturally with your home routine with no adjustment needed
- Layer in collagen-stimulating treatments (RF microneedling, Botox, fractional laser) once your skin is in its best baseline condition
One important heads-up: If you’re actively using a retinoid, most med spa providers will ask you to pause it 3–5 days before and after procedures like microneedling or peels. Tell your provider exactly what you’re using — don’t assume they’ll ask. For a full breakdown of how med spa options compare, browse our med spa treatments guide.
Key Takeaways
- A skin care routine for busy moms doesn’t need to be complicated — a 3-product AM stack and a retinoid PM routine is the proven foundation
- Daily SPF is the highest-return anti-aging investment you can make — more than any serum or device
- Vitamin C in the AM, retinoid at PM — separating them by time eliminates irritation and preserves both benefits
- Results take time: texture and hydration in 2–4 weeks; meaningful fine line and tone improvement in 8–12 weeks
- Pregnancy or breastfeeding? Pause retinoids immediately; mineral SPF + HA + vitamin C is your safe AM stack
- Med spa treatments accelerate results but should layer on top of — not replace — your home routine
- Introduce one new active at a time, every other night, for two weeks before increasing frequency
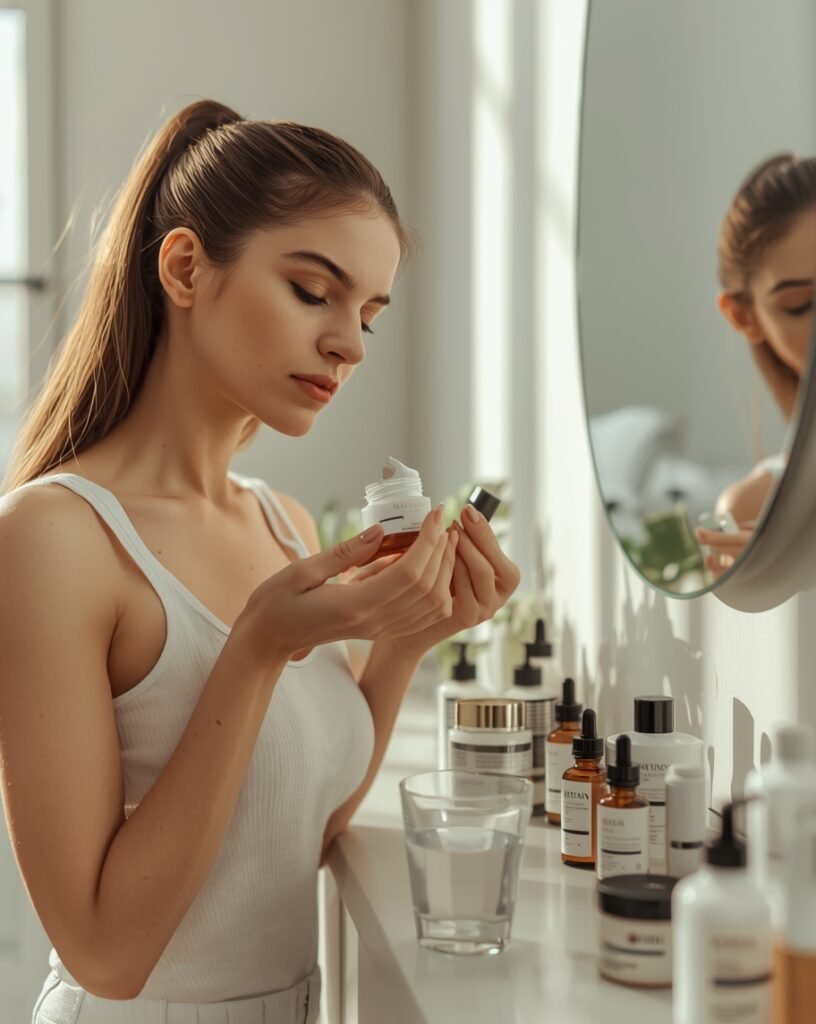
Frequently Asked Questions
What is the best skin care routine for busy moms?
The best skin care routine for busy moms is a targeted 3-product AM stack — vitamin C serum, hyaluronic acid, and broad-spectrum SPF — followed by a gentle cleanser and retinoid at night. This 15-minute approach delivers proven anti-aging results without the complexity, cost, or product waste of multi-serum routines.
How do I build an anti-aging routine in 15 minutes?
Stick to five steps in the morning: cleanser, vitamin C serum, HA hydrator, ceramide moisturizer, SPF. In the evening: cleanser, retinoid, barrier moisturizer. Each step has a clear job — protect in the AM, repair at night. Cut anything that doesn’t serve one of those two jobs.
Can I use vitamin C and retinol in the same routine?
Yes — but separate them by time of day. Vitamin C goes in the morning for antioxidant protection; retinoids go at night for collagen stimulation and cell turnover. Layering both at night increases irritation with no additional benefit.
What skin care products are safe during pregnancy?
Hyaluronic acid, mineral sunscreen (zinc oxide), and vitamin C are generally considered safe during pregnancy. Topical retinoids — including OTC retinol and adapalene — should be stopped as soon as you’re trying to conceive or learn you’re pregnant. Always confirm with your OB before using any active ingredient.
How quickly will I see results from a new skin care routine for busy moms?
Surface hydration and texture typically improve within 2–4 weeks. Meaningful collagen-driven changes — reduced fine lines, more even tone — require 8–12 weeks of consistent retinoid use alongside daily SPF. Tracking progress with photos every four weeks is the most reliable way to see gradual improvement.
What is the correct order to apply skin care products?
Apply thinnest to thickest: cleanser → vitamin C serum → HA serum → moisturizer → SPF in the morning. At night: cleanser → retinoid → barrier moisturizer. Wait 30–60 seconds between layers to allow absorption and prevent pilling.
What is the best drugstore moisturizer with SPF for moms?
CeraVe AM Facial Moisturizing Lotion (SPF 30) is one of the best drugstore options — it combines ceramides for barrier support with built-in broad-spectrum protection in a lightweight, fragrance-free formula. It works for most skin types and doubles as both moisturizer and SPF when mornings are very tight.
Should I add med spa treatments to my home skin care routine for busy moms?
Yes — but establish your home routine first. Med spa treatments like Botox, RF microneedling, or Hydrafacial work as accelerators layered on top of a consistent skincare foundation. Tell your provider exactly what actives you’re using, especially retinoids, as most procedures require a brief pause before and after treatment.
This post is for informational purposes only and is not a substitute for professional medical or dermatological advice. Consult your dermatologist or OB-GYN before starting new active ingredients, especially during pregnancy or breastfeeding.

The Best Facial Treatments for Aging Skin: Quick, Effective Options for Busy Moms
You don’t need hours in a clinic or a week of hiding at home to see real results. This guide compares the most time-efficient facial treatments for aging skin, sorted by appointment length, downtime, and what they actually fix, so you can build a plan that fits between school runs and everything else.
TL;DR
- Best zero-downtime option: Hydrafacial (30–45 min): immediate glow, pore cleansing, surface hydration; maintenance only, not collagen remodeling
- Best for pigment and redness: IPL photofacial (20–30 min): targeted brown spots and vascular redness; plan quarterly
- Best for wrinkle relaxation: Botox/neuromodulators (10–15 min, zero downtime): visible in ~1 week, lasts 3–4 months
- Best for collagen remodeling: Microneedling or RF microneedling: real structural change with 2–5 days downtime; plan as a series
- Smartest annual plan: Monthly Hydrafacial for maintenance + quarterly IPL or peel for pigment + Botox every 3–4 months
- Sequencing rule: Peels before injections = wait 1–2 weeks; neuromodulators before resurfacing if wrinkle goal; energy work first if tightening is priority
- Pregnant or breastfeeding? Always disclose before booking; injectables and some energy-based protocols are typically deferred
Table of Contents
How to Choose a Facial Treatments For Aging Skin When Time Is the Constraint
The right facial treatment for a busy mom comes down to two questions: how much time can you give the appointment, and how much recovery can you absorb? Zero-downtime options like Hydrafacial deliver immediate surface improvement; collagen-stimulating treatments like microneedling or chemical peels require more planning but produce lasting structural change.
Matching your treatment tier to your actual schedule, not your aspirational one, is what makes a plan work long-term. A mom who books an aggressive peel the week before a school event will either skip recovery steps or skip the event. Neither outcome serves the goal.
Think in three tiers: surface maintenance (Hydrafacial, dermaplaning: zero downtime, monthly), targeted correction (IPL, light peels, Botox: minimal downtime, quarterly), and structural remodeling (microneedling, RF microneedling, medium peels: planned downtime, one to two times per year). Build your plan from the first tier up.
Hydrafacial — The Best Quick-Win Facial for Busy Moms
Hydrafacial is the most consistently reliable zero-downtime facial treatment available for busy moms. In 30–45 minutes the device exfoliates, extracts debris with vortex suction, and infuses targeted serums, producing immediate surface hydration, visibly cleaner pores, and a brighter complexion with essentially no recovery time.
What Hydrafacial Does (and Doesn’t Do)
Hydrafacial is excellent at what it is: a surface-level maintenance treatment that delivers a predictable, same-day glow. It softens the look of fine lines temporarily through hydration, clears congestion, and makes skin look and feel healthier within hours. What it does not do is rebuild collagen, tighten lax skin, or produce the lasting textural improvement of microneedling or a chemical peel.
The most common mistake is expecting Hydrafacial to replace deeper treatments. Use it as your consistent maintenance layer: the treatment that keeps skin in its best baseline condition between more targeted procedures. It shines brightest when paired with quarterly IPL for pigment control or a periodic resurfacing session for collagen work.
Real-world example: One mom schedules a 35-minute Hydrafacial the Friday morning before a family photo weekend. Smoother skin, fewer visible pores, better makeup application: no missed activities, no recovery window needed. Another mom pairs monthly Hydrafacials with one quarterly IPL session, using the Hydrafacial to calm and hydrate skin between light resurfacing sessions.
How to Choose the Right Hydrafacial Booster
Boosters are add-on serums infused during the treatment: antioxidant, brightening, growth factor, peptide, or clarifying options. Pick the booster that matches your actual skin goal, not the most expensive one on the menu.
- Antioxidant or brightening booster: Best for dull skin and mild hyperpigmentation
- Growth factor or peptide booster: Best for post-procedure recovery support or mature skin
- Clarifying booster: Best for congested, acne-prone skin
- Avoid: Retinol-containing boosters if pregnant or breastfeeding; high-percentage acid boosters immediately post-treatment on sensitive skin
How to Fit Hydrafacial Into a Busy Schedule
Hydrafacial fits into a 45-minute school drop-off window, a lunch break, or a Friday morning before a weekend event. No pre-treatment prep is required beyond arriving with clean skin. Most moms schedule monthly sessions and treat it as their skincare maintenance anchor.
Hydrafacial at a Glance
| Detail | Information |
|---|---|
| Session time | 30–45 minutes |
| Downtime | None to minimal (brief redness possible) |
| Cost per session | $150–$300; boosters add $25–$75+ |
| Best for | Hydration, glow, pore cleansing, maintenance |
| Cadence | Monthly |
| Contraindications | Active open wounds, uncontrolled rosacea, isotretinoin within 6 months |
| Pregnancy/breastfeeding | Check booster ingredients; confirm with provider |
For more on how Hydrafacial compares to other express treatment options, see our full med spa facial treatments guide.
Chemical Peels – When You Want More Than a Surface Glow
Chemical peels use acids to remove damaged surface skin and stimulate fresh cell turnover. They sit above Hydrafacial in the intervention ladder, offering more downtime, more visible results, and more lasting improvement in pigmentation, fine lines, and skin texture. For busy moms, superficial peels are the accessible entry point; medium-depth peels are a “plan your calendar” procedure.
Superficial vs. Medium-Depth Peels: Which Is Right for You?
Superficial peels (glycolic, lactic, mandelic, low-percentage salicylic) work on the outermost skin layer. Expect mild flaking for 2–4 days and visible improvement in tone and texture within a week. They fit into a short weekend recovery and are safe to repeat every 4–6 weeks.
Medium-depth peels (TCA 20–35%, Jessner’s) penetrate deeper for more significant pigmentation correction and wrinkle improvement. Expect 5–10 days of visible peeling and social avoidance. These are best planned around school breaks, long weekends, or a stretch of remote work. One well-timed medium peel can deliver results that require months of superficial peel sessions to approach.
How to Time a Peel Around Injections and Life Events
The injection timing rule: Wait approximately one week after a superficial peel before getting Botox or fillers. Wait one to two weeks after a medium-depth peel. Injecting into recently peeled skin increases infection risk and can compromise results on both sides.
The event timing rule: Book a superficial peel at least 10–14 days before any important event to allow the brief flaking phase to complete and the glow to fully emerge. For medium peels, plan four weeks minimum before an event.
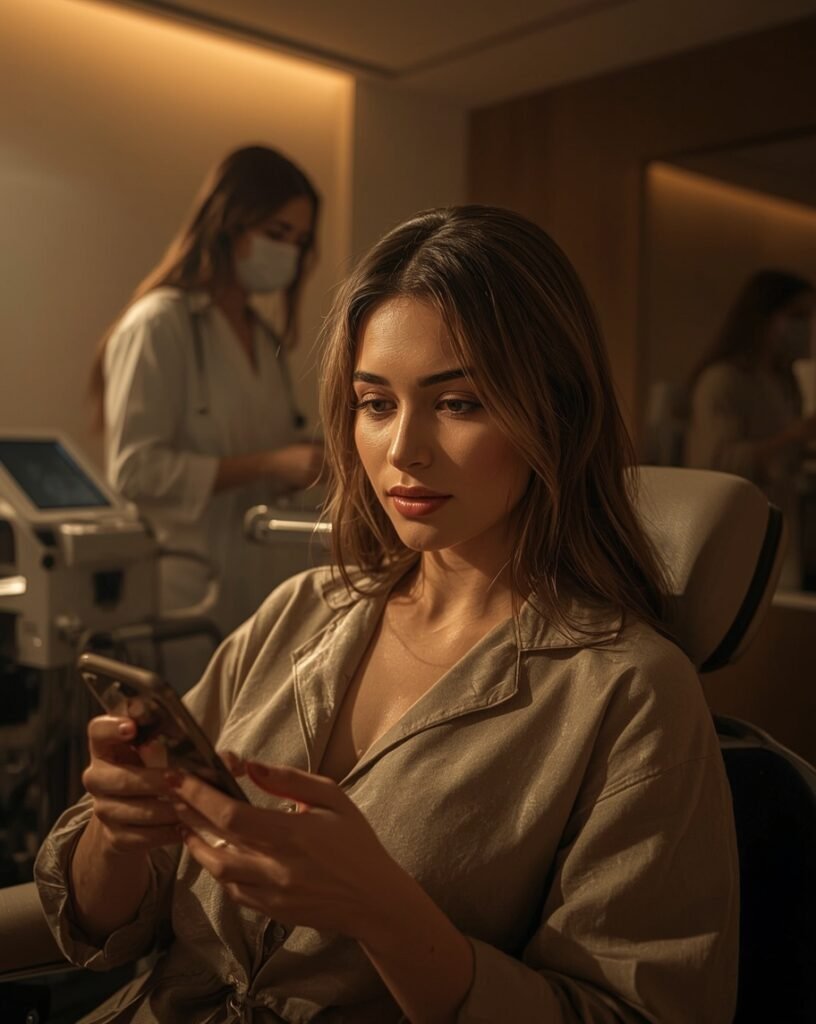
Chemical Peel Comparison
| Peel Type | Depth | Downtime | Best For | Cost Per Session |
|---|---|---|---|---|
| Superficial (glycolic, lactic) | Epidermal | 2–4 days mild flaking | Tone, dullness, mild pigment | $100–$300 |
| Medium (TCA, Jessner’s) | Upper dermis | 5–10 days peeling | Pigmentation, fine lines, texture | $300–$800 |
| Deep (phenol) | Mid-dermis | 10–14+ days | Significant resurfacing | $1,000–$3,000+ |
The American Academy of Dermatology offers a straightforward overview of what to expect from chemical peels, including depth, recovery, and what questions to ask your provider before booking.
IPL Photofacial — The Best Option for Pigment and Redness
IPL (Intense Pulsed Light) is the most efficient targeted treatment for brown spots, sun damage, and vascular redness on lighter skin tones. Sessions run 20–30 minutes with 2–5 days of mild darkening before spots flake away — a predictable recovery window most moms can plan around a weekend. It pairs naturally with Hydrafacial as a quarterly pigment-control layer within a monthly maintenance plan.
IPL is a strong fit for moms whose primary complaint is uneven tone or sun spots rather than texture or laxity. It’s not suited for darker skin tones (Fitzpatrick IV–VI) without specialist assessment — the risk of post-inflammatory hyperpigmentation increases significantly. Always confirm your Fitzpatrick type with the provider before booking.
Best for: Brown spots, sun damage, rosacea redness, broken capillaries on Fitzpatrick I–III Downtime: 2–5 days (spots darken, then flake off — plan accordingly) Cost: $300–$600 per session; most clients need 2–4 sessions for full correction Cadence: Quarterly maintenance after initial series
Neuromodulators (Botox) — The Fastest Anti-Aging Facial Result
Botox and other neuromodulators (Dysport, Xeomin, Daxxify) produce visible wrinkle smoothing in about one week, with appointments running 10–15 minutes and zero downtime. They are the highest-convenience anti-aging option available and fit naturally into a quarterly treatment cadence alongside your facial maintenance plan.
Neuromodulators address dynamic wrinkles — the lines caused by repeated facial muscle movement: forehead lines, crow’s feet, frown lines between the brows. They do not treat skin texture, pigmentation, or laxity. For those concerns, your maintenance facials and periodic resurfacing sessions do the work.
Best for: Forehead lines, crow’s feet, glabellar frown lines Appointment time: 10–15 minutes Downtime: None (avoid lying flat or intense exercise for 4 hours post-injection) Cost: $10–$15 per unit; $200–$600 per typical treatment area Cadence: Every 3–4 months
How to Combine Facial Treatments For Aging Skin Without Conflicts
Treatment sequencing is the skill most moms don’t realize matters until they’ve made a scheduling mistake. The good news: the rules are simple once you know them.
Peels + Injections: The Timing Rule
Always complete your peel first, then wait before injecting. The skin barrier is compromised post-peel; injections into compromised skin increase infection risk and reduce predictability of both the peel result and the filler placement.
- Superficial peel → wait ~1 week → Botox or filler safe
- Medium-depth peel → wait 1–2 weeks → Botox or filler safe
- Never inject immediately before or after a peel in the same session
Microneedling or Lasers + Neuromodulators: How to Sequence
The sequencing here depends on your primary goal:
- Wrinkle smoothing is the priority: Dose neuromodulators first. Once muscles are relaxed (3–7 days), schedule your microneedling or laser session. The reduced muscle movement during healing can support better collagen remodeling outcomes.
- Skin tightening is the priority: Complete your energy-based treatment (microneedling, RF, laser) first. Allow inflammation to fully settle, then add neuromodulators as a finishing layer.
Treatment Combination Guide
| Combination | Timing | Notes |
|---|---|---|
| Hydrafacial + Botox | Same week is fine | Hydrafacial first; injections after |
| Superficial peel + Botox | 1-week gap | Peel first, then injections |
| Medium peel + Botox | 1–2 week gap | Peel first, then injections |
| Microneedling + Botox (wrinkle goal) | Botox first, microneedling 3–7 days later | Allows muscle relaxation before healing |
| Microneedling + Botox (tightening goal) | Microneedling first, Botox after inflammation clears | Typically 1–2 weeks gap |
| IPL + Hydrafacial | Hydrafacial after IPL to calm skin | Good post-IPL recovery pairing |
Are These Facial Treatments For Aging Skin Safe During Pregnancy or Breastfeeding?
Always disclose pregnancy or breastfeeding status before booking any med spa treatment. Recommendations vary by procedure and provider — what follows is general guidance, not a substitute for a conversation with your OB and treating clinician.
| Treatment | Pregnancy | Breastfeeding | Notes |
|---|---|---|---|
| Hydrafacial (base) | ⚠️ Discuss with provider | ⚠️ Check booster ingredients | Avoid retinol boosters; confirm actives |
| Dermaplaning | ✅ Generally low-risk | ✅ Generally low-risk | Mechanical only; no active ingredients |
| Superficial chemical peel | ⚠️ Generally deferred | ⚠️ Discuss with provider | Some providers offer light lactic; confirm |
| IPL | ❌ Defer | ❌ Defer | Heat and hormonal pigment changes are a risk |
| Botox / neuromodulators | ❌ Defer | ❌ Defer | Standard guidance: avoid injectables |
| Microneedling / RF | ❌ Defer | ⚠️ Discuss with provider | RF energy; most defer until postpartum |
| LED therapy | ✅ Generally low-risk | ✅ Generally low-risk | Visible light only; widely considered safe |
Practical guidance for postpartum moms: Start with dermaplaning and LED therapy, then layer in Hydrafacial once cleared by your provider. Defer injectables and energy-based procedures until breastfeeding is complete or after a full risk discussion with a board-certified clinician.
What a Realistic Annual Facial Treatment Plan Looks Like
The best long-term value comes from a mixed plan: efficient monthly maintenance plus targeted quarterly or semiannual resurfacing and tightening. Here’s what that looks like in practice:
| Cadence | Treatment | Time Per Visit | Annual Sessions |
|---|---|---|---|
| Monthly | Hydrafacial (maintenance + glow) | 30–45 min | 12 |
| Quarterly | IPL or superficial chemical peel | 20–45 min | 4 |
| Every 3–4 months | Botox/neuromodulators | 10–15 min | 3–4 |
| 1–2x per year | Microneedling or RF microneedling | 45–90 min | 1–2 |
Estimated Annual Budget
| Tier | Treatment | Annual Cost Estimate |
|---|---|---|
| Monthly maintenance | Hydrafacial x12 | $1,800–$3,600 |
| Quarterly targeted | IPL x4 or superficial peels x4 | $1,200–$2,400 |
| Neuromodulators | Botox x3–4 | $600–$2,400 |
| Annual resurfacing | Microneedling series or 1 medium peel | $600–$3,000 |
| Total annual range | $4,200–$11,400 |
Practical tip: Most moms prioritize two or three tiers rather than all four. Start with Hydrafacial + Botox as the foundation, add IPL or a peel when the budget and schedule allow. Microneedling series are a once-or-twice-a-year investment, not a monthly commitment.
How to Choose a Qualified Provider
Credentials and complication protocols matter more than glossy before-and-after photos. A great provider is transparent about their training, their device details, and exactly what they will do if something goes wrong.
Provider selection checklist:
- Board-certified dermatologist, plastic surgeon, or licensed medical aesthetician working under medical supervision
- Can name the specific device, peel formula, or injectable product being used
- Has before-and-after photos of patients with your skin tone and concern
- Explains their adverse event protocol clearly — what happens if you have a reaction?
- Provides a written recovery and aftercare plan
- Does not pressure you to book same-day or use “today only” pricing
- Performs a clinical assessment before recommending any specific treatment
Red flags:
- Vague answers about device models or product brands
- No photos for your skin tone or concern
- Dismissive response when asked about complications
- Upselling multiple treatments in the same session before assessing your skin
What to Bring to Your Med Spa Consultation
A prepared consult is a decisive consult. Bring these four things and you will leave with a clear treatment plan rather than a vague recommendation list:
- Current medication list — including topical prescriptions (retinoids, hydroquinone) and any oral medications that affect photosensitivity or wound healing
- Recent procedure dates — last peel, last injection, any laser treatments in the past 12 months
- Daylight photos of your skin — taken in natural light without filters, showing current tone, texture, and any specific concerns
- Your actual skincare products — not the aspirational lineup, the ones you use daily — so the provider can assess active ingredient interactions before booking

Key Takeaways
- The best facial treatments for aging skin match the appointment and recovery time you can realistically absorb — not the most dramatic result possible
- Hydrafacial is the best zero-downtime maintenance facial — use it monthly to keep skin in its best baseline condition
- IPL is the most efficient treatment for pigment and redness on lighter skin tones; plan quarterly
- Botox delivers the fastest anti-aging result — 10–15 minutes, zero downtime, visible in one week
- Peels and microneedling produce lasting collagen-level change but require a planned recovery window
- Sequencing matters: peels before injections (1–2 week gap); neuromodulators or energy work first depending on your primary goal
- Always disclose pregnancy or breastfeeding status — injectables and most energy-based procedures are deferred
- Provider credentials and complication protocols are more important than price or before-and-after aesthetics
Frequently Asked Questions
What is the best facial treatment for aging skin?
The best facial treatment for aging skin depends on your primary concern and schedule. For immediate glow with zero downtime, Hydrafacial is the most reliable option. For wrinkle relaxation, Botox produces visible results in about one week. For lasting collagen remodeling and texture improvement, microneedling or RF microneedling delivers the most significant structural change. Most moms get the best results from a layered plan that combines all three tiers.
Which facial treatment has no downtime?
Hydrafacial, dermaplaning, LED therapy, and Botox injections all have essentially zero downtime. Superficial chemical peels require 2–4 days of mild flaking. Microneedling requires 24–72 hours of redness. For true zero-downtime facial treatments that fit a school-week schedule, Hydrafacial and Botox are the most reliable options.
How often should I get a facial treatment for anti-aging?
A practical maintenance cadence for most moms is: Hydrafacial monthly, IPL or a superficial peel quarterly, Botox every 3–4 months, and a microneedling series once or twice per year. This tiered approach keeps skin in consistent good condition while delivering periodic deeper improvements.
Can I get facial treatments while breastfeeding?
Some facial treatments are generally considered low-risk while breastfeeding — dermaplaning and LED therapy are common examples. Injectables like Botox and most energy-based procedures including IPL and RF microneedling are typically deferred. Always disclose breastfeeding status before booking and confirm with your OB and treating clinician before proceeding with any active treatment.
How do I combine Botox with facial treatments?
Botox pairs well with most facial treatments — the sequencing rules are straightforward. If a chemical peel is also planned, complete the peel first and wait one to two weeks before injecting. If microneedling is the goal and wrinkle smoothing is the priority, dose Botox first and schedule microneedling three to seven days later once muscles begin to relax.
How much does a year of facial treatments cost?
A realistic annual maintenance plan — monthly Hydrafacials, quarterly IPL or peels, and Botox three to four times per year — typically runs $4,000–$8,000 depending on your market and the specific treatments chosen. Adding a microneedling series increases the total. Most moms start with two tiers (Hydrafacial + Botox) and expand as budget allows.
What should I ask at a med spa consultation?
Ask the provider to name the specific device or product being used, show before-and-after photos of patients with your skin tone, explain the exact downtime in days, describe their adverse event protocol, and confirm who performs the treatment. Bring your medication list, recent procedure history, and current skincare products.
How do I choose a qualified provider for facial treatments?
Prioritize board-certified dermatologists, plastic surgeons, or licensed medical aestheticians working under medical supervision. Ask specifically about how they handle adverse events. Request before-and-after photos for patients with similar skin tones and concerns. A provider who cannot clearly explain their complication protocol or name the specific device they use is a red flag.
This post is for informational purposes only and is not a substitute for professional medical or dermatological advice. Always consult a board-certified clinician before beginning any in-office treatment, especially if you are pregnant, breastfeeding, or taking prescription medications.